
Welcome! In this comprehensive guide, I’m going to walk you through the crucial first steps to get your website and entire snapshot set up using Lead Connector (GFunnel). Whether you’re a solo SaaSpreneur or building a full agency, mastering custom values and linking your domain correctly will save you countless hours and make your marketing automation seamless and dynamic.
This article breaks down the process of connecting your domain, updating essential custom values like URLs and phone numbers, and leveraging automation workflows that dynamically use these values for personalized communication. By the end, you’ll understand why custom values are powerful, how they keep your campaigns consistent, and how to use them effectively within your Lead Connector ecosystem.
Why Custom Values Matter in Lead Connector With GFunnel
Custom values are the backbone of dynamic content in Lead Connector (GFunnel). Think of them as placeholders that you define once, and then reference throughout your entire system—your website, SMS campaigns, emails, and automations.
Instead of manually updating your website, phone numbers, or calendar links in multiple places, you update a single custom value, and every reference automatically updates everywhere it’s used. This is a massive time saver and drastically reduces errors or inconsistencies.
For example, when you update your sales calendar link in a custom value, every SMS that sends that link will automatically have the correct URL without you having to touch every message. This concept is at the heart of building scalable marketing and sales processes in Lead Connector.
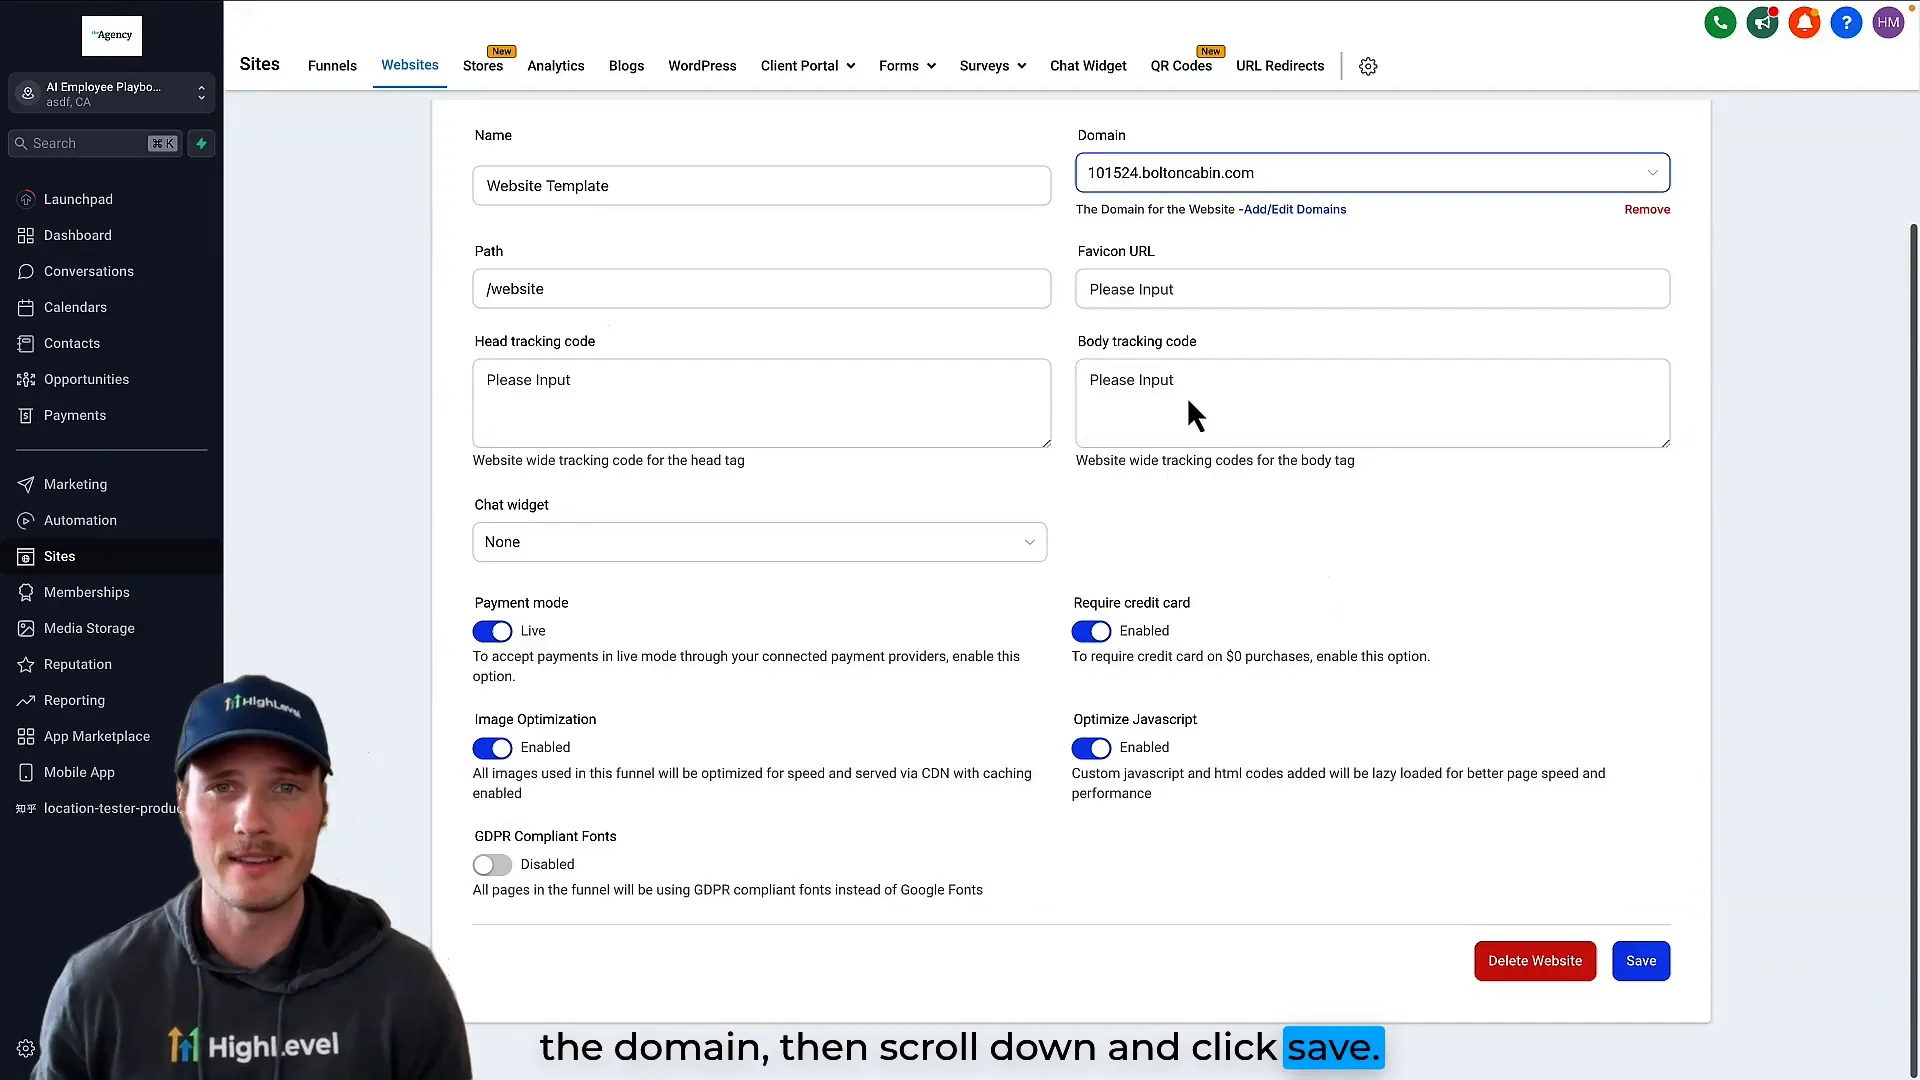
Step 1: Connect Your Domain to Your Website
The first step to making your website live and professional is connecting your custom domain. Here’s exactly how to do it:
- Log in to your agency subaccount in Lead Connector (GFunnel).
- Navigate to Sites and then click on Websites.
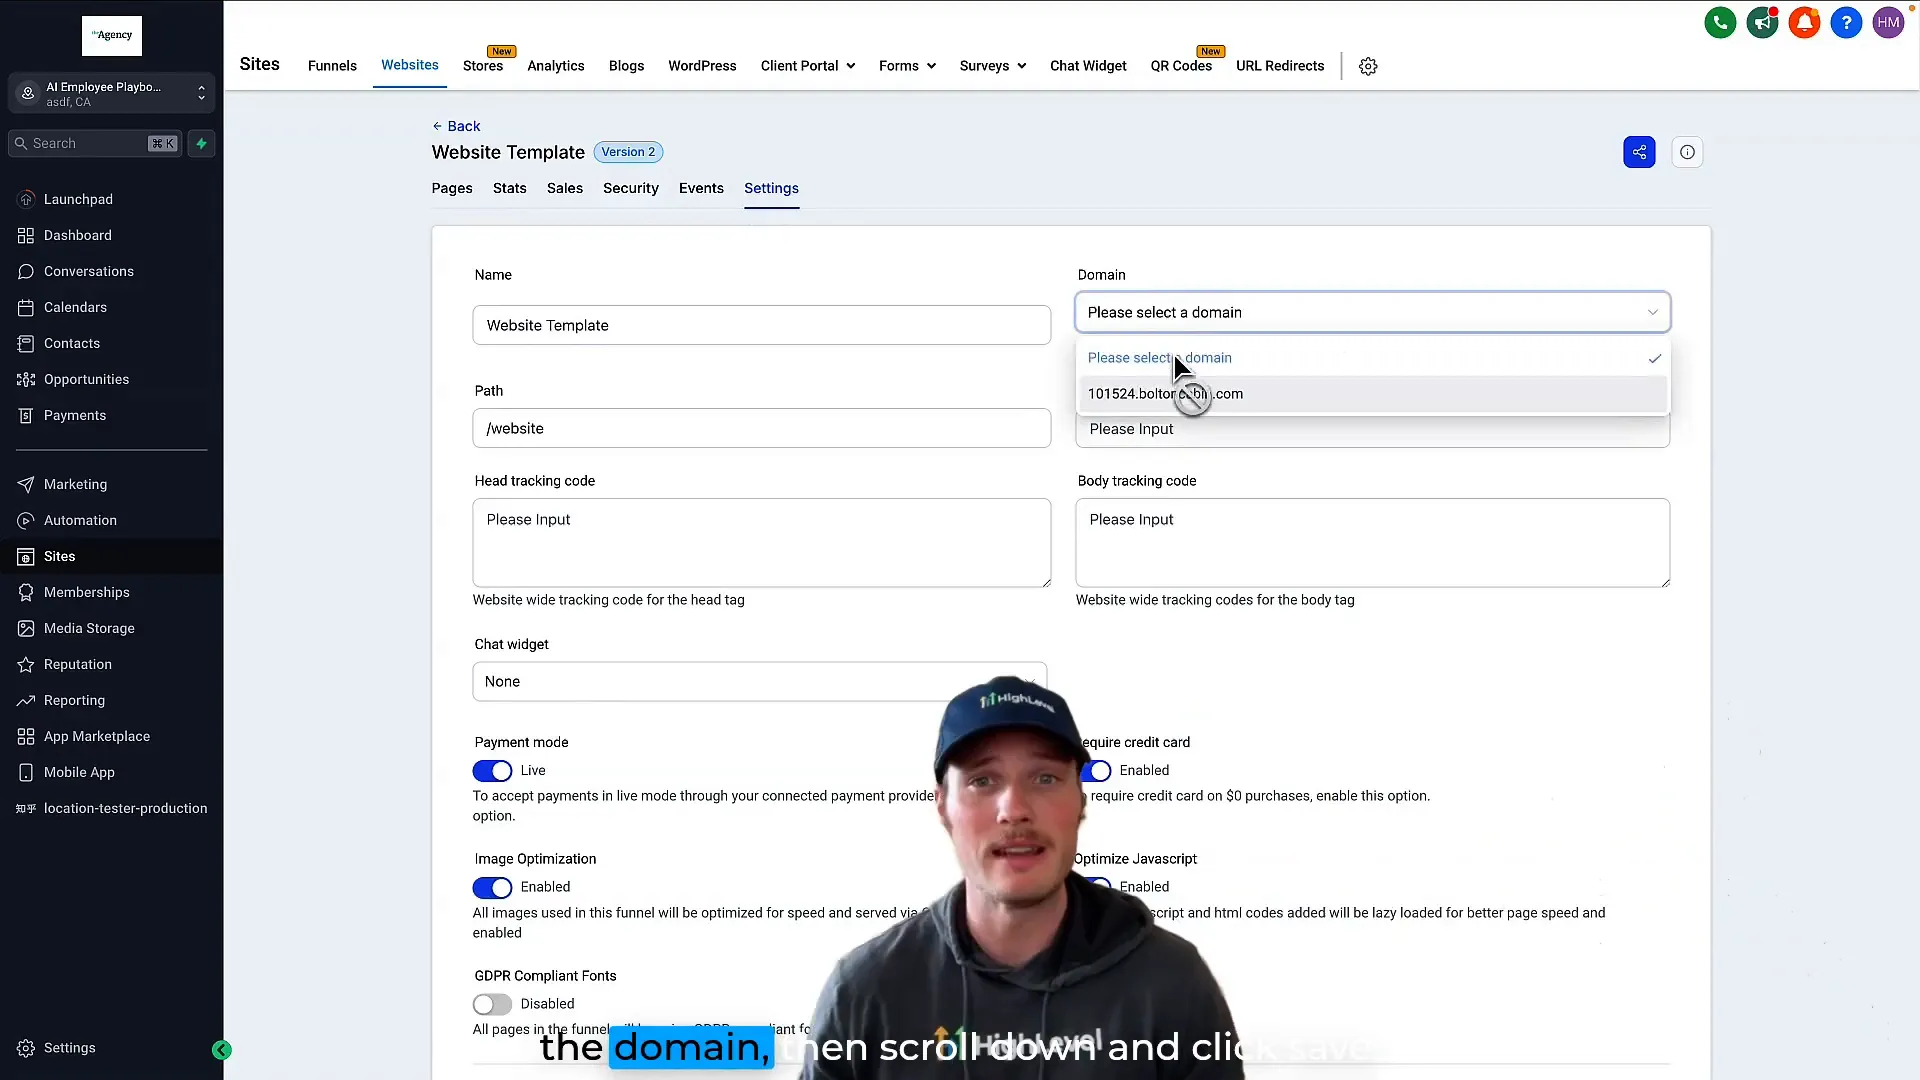
- Find your website template, click into it, and then select Settings.
- In the top right corner, you’ll see an option to select your domain. Choose the domain you want to use.
- Scroll down and click Save.
Once done, your domain will be attached to your website, making it technically live on the web. This is a pivotal moment — you now have a live website that you can start customizing and optimizing.
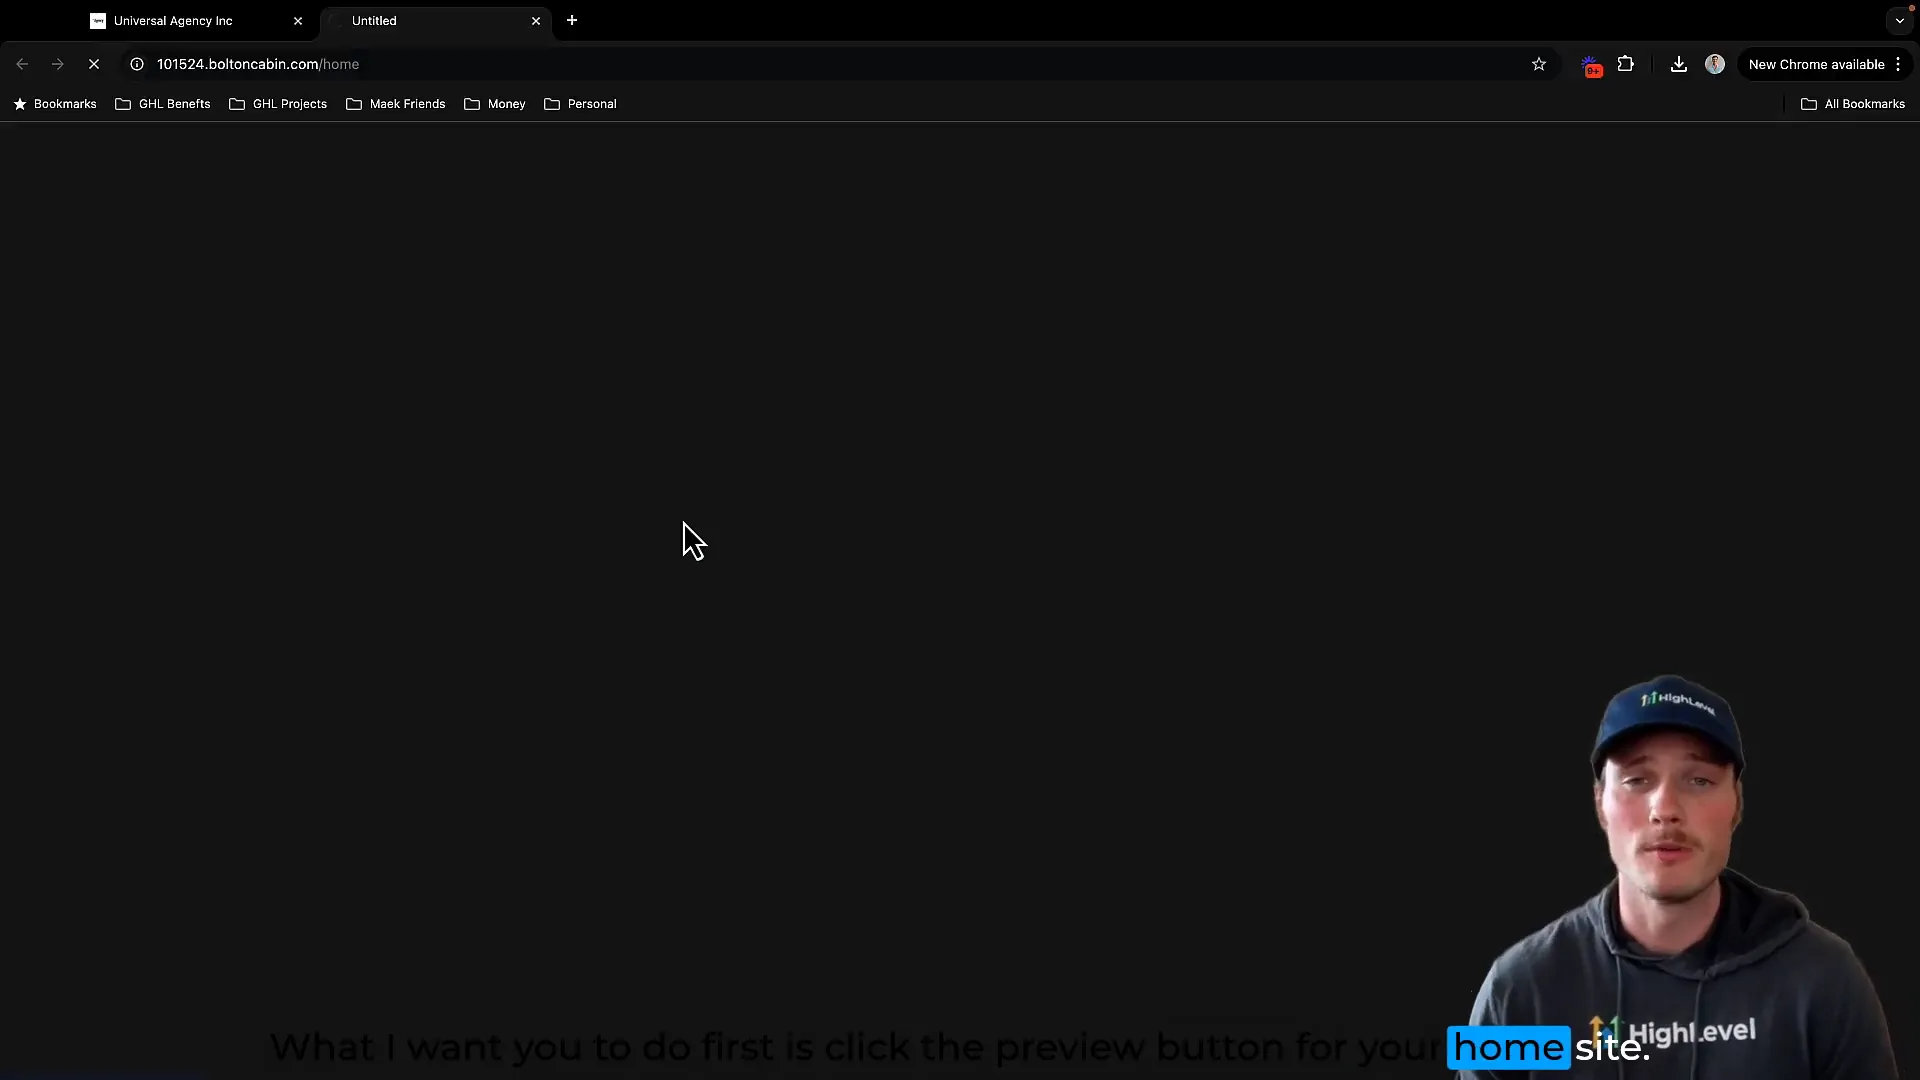
Step 2: Preview Your Website and Copy URLs
Before diving into customization, it’s smart to preview your live website and grab the URLs you’ll need for custom values. This process ensures that your links are accurate and ready to be referenced dynamically in your automations and site content.
- In your subaccount under Sites, click the Preview button for your homepage.
- This will open the live domain in a new tab. Copy the URL from your browser’s address bar.
- Repeat this process for other important pages like your Demo Sales Calendar and Onboarding pages, copying their URLs as well.
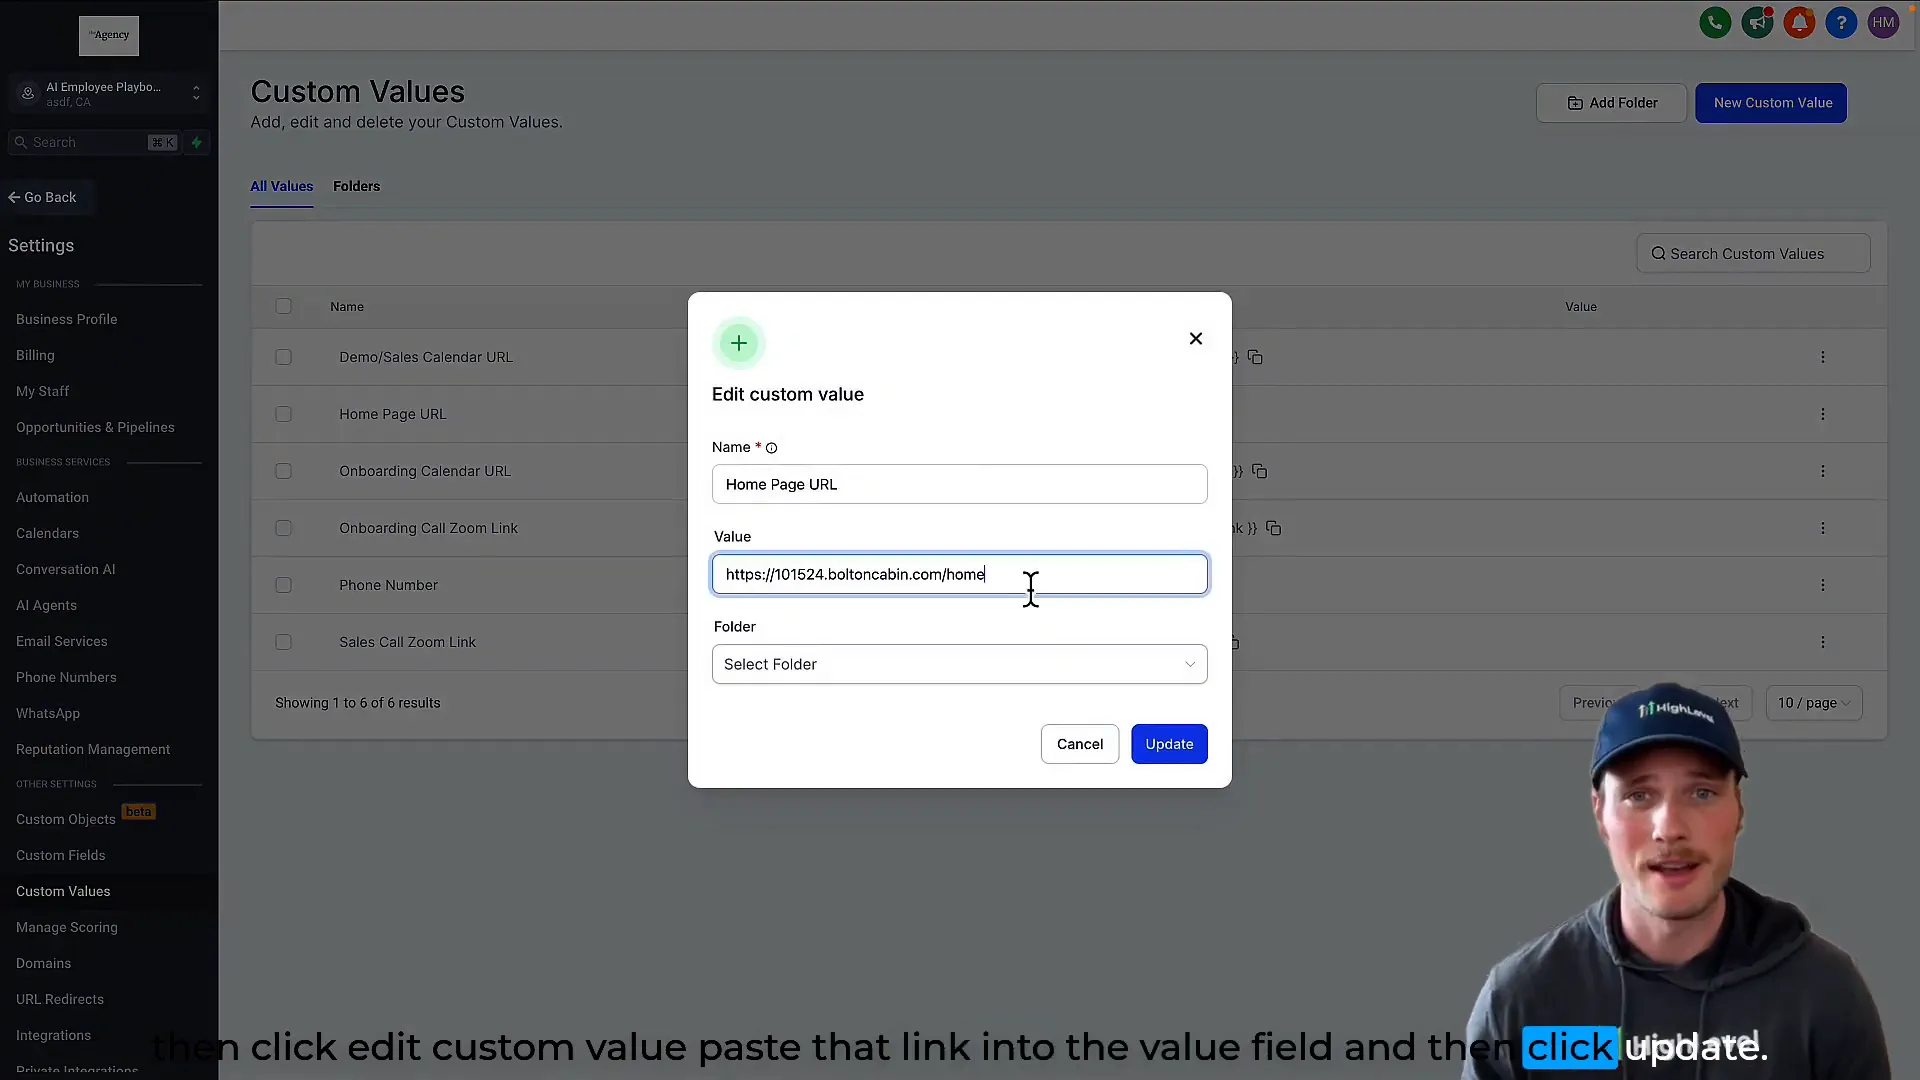
Step 3: Update Custom Values in Settings
Now that you have the URLs, the next step is to update your custom values within your subaccount settings. This is where you define the dynamic content that your entire system will reference.
- Go to the bottom left corner of your subaccount dashboard and click Settings.
- Scroll down to find Custom Values and click into it.
- Find the custom value named Homepage URL. Click the three-dot menu on the right and select Edit Custom Value.
- Paste the copied homepage URL into the value field and click Update.
- Repeat this process for the Demo Sales Calendar URL and Onboarding Page URL, pasting their respective URLs into each custom value.
This step is one of the smartest ways to manage your website and marketing assets because it centralizes all your important URLs into one easily updatable place.
Step 4: Update Your Phone Number
Next, you need to update your phone number custom value. This phone number will be used across your website, SMS campaigns, and automations, ensuring consistent contact information wherever your prospects interact with you.
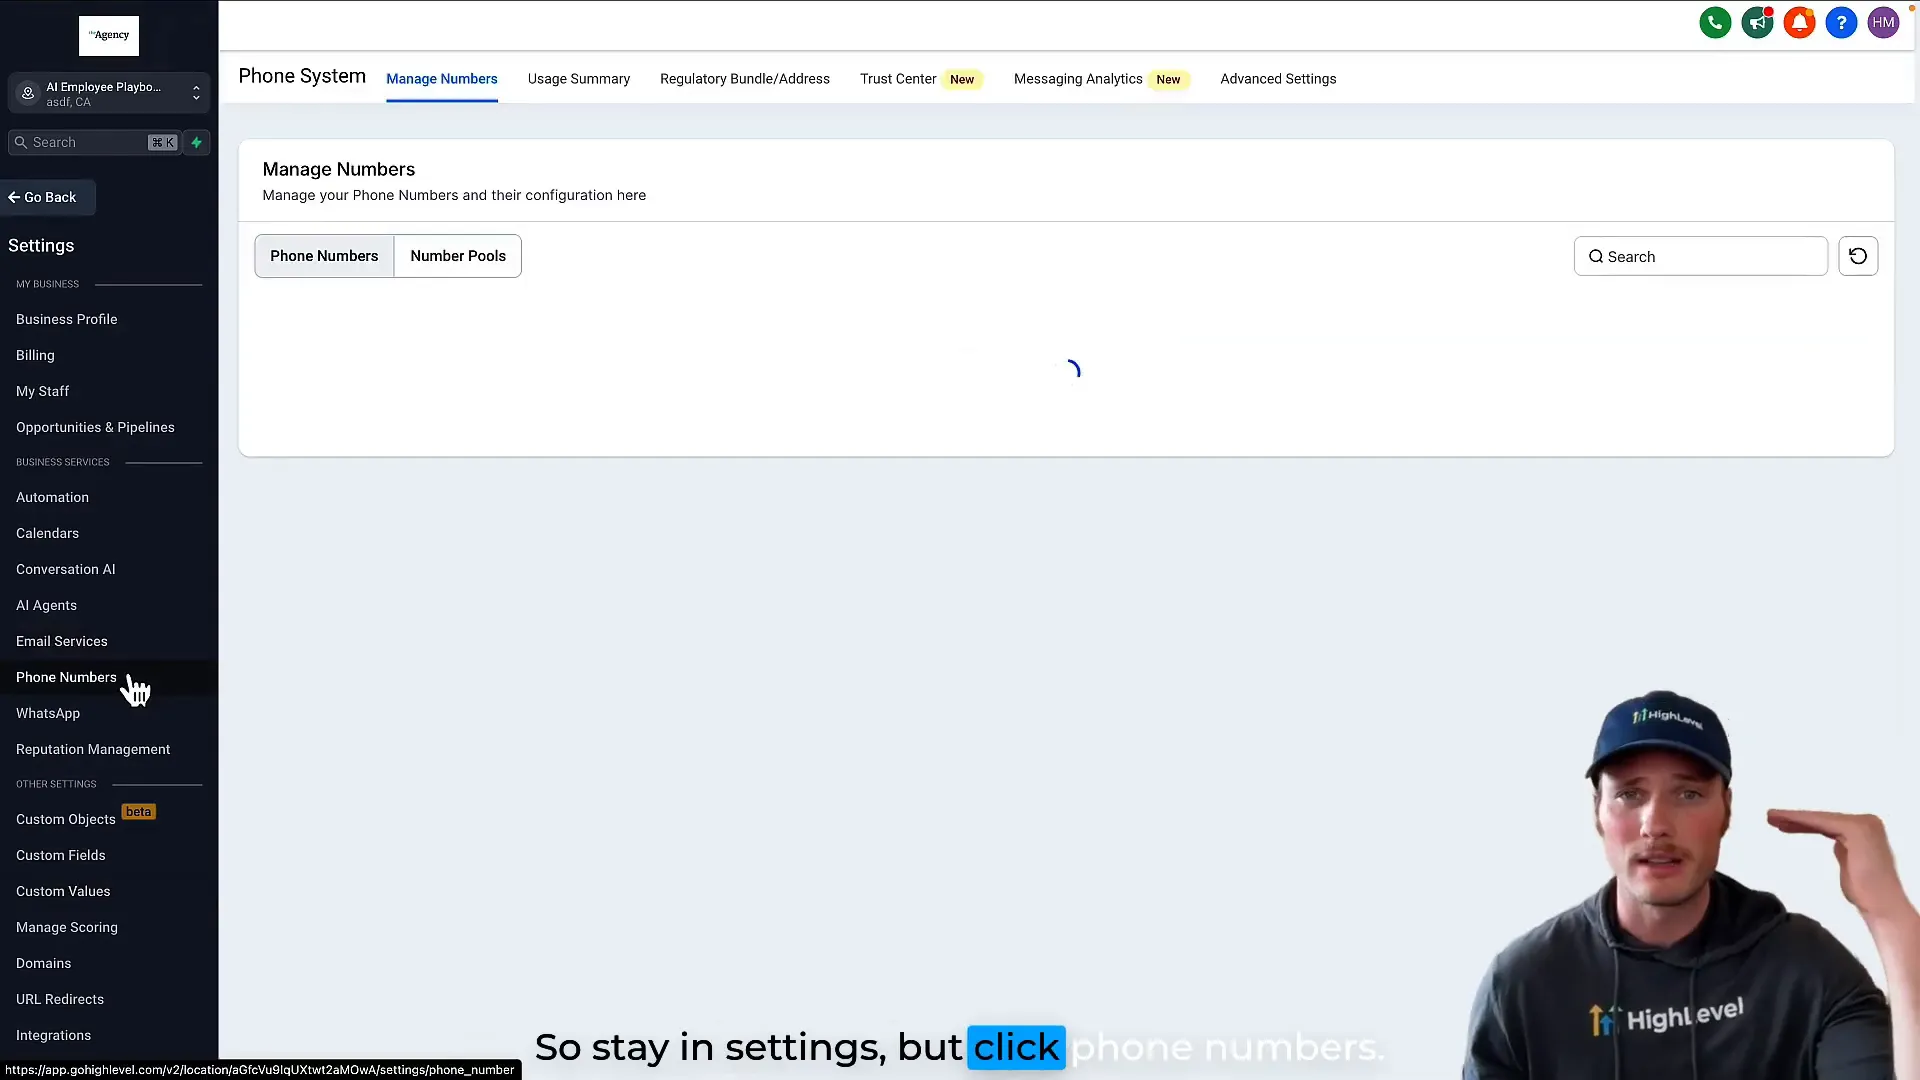
- In Settings, navigate a few options above Custom Values to find Phone Numbers.
- If you don’t already have a phone number, you can acquire one from within Lead Connector by following the phone number setup module.
- Copy your phone number from the list.
- Return to Custom Values and find the Phone Number custom value.
- Edit this value and paste your phone number, then save.
Having your phone number set as a custom value means you never have to manually update it in multiple places—just update here, and it reflects everywhere.
Step 5: Add Your Sales and Onboarding Call Links
Finally, you want to add your personal meeting room links for sales and onboarding calls. These are typically Zoom links, but you can use any platform like Google Meet or ScheduleOnce. These links will be used in SMS follow-ups and scheduling automations.
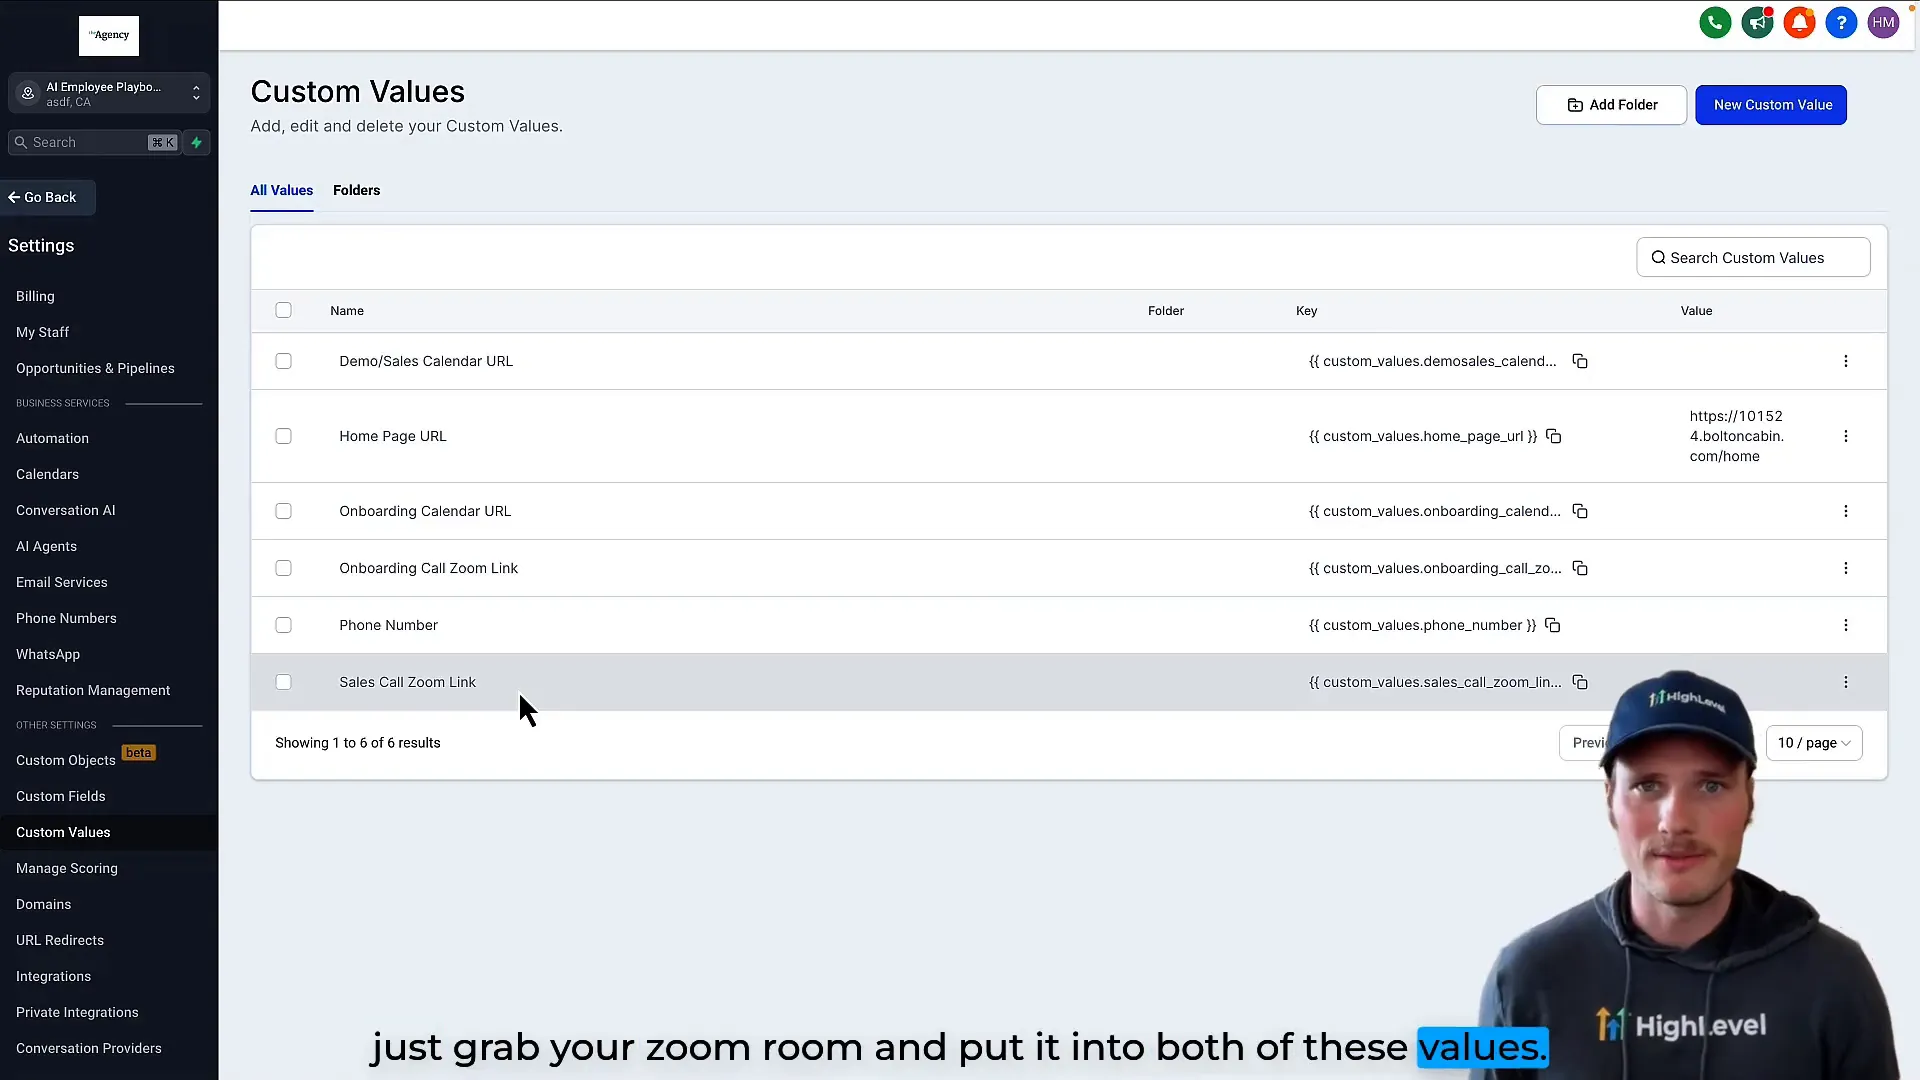
- In Custom Values, find the two remaining values: Onboarding Call Zoom Link and Sales Call Zoom Link.
- Paste your personal Zoom meeting link into both fields if you are running the business solo.
- If you have separate teams for sales and onboarding, you can add different links here to reflect that.
This allows your prospects to easily book the right call with the right team member, all dynamically controlled through custom values.
Step 6: Understand How Custom Values Work in Automations
So, why did we go through all this effort updating custom values? Because these values are referenced dynamically throughout your Lead Connector system, especially in automations, making your workflows smarter and easier to maintain.
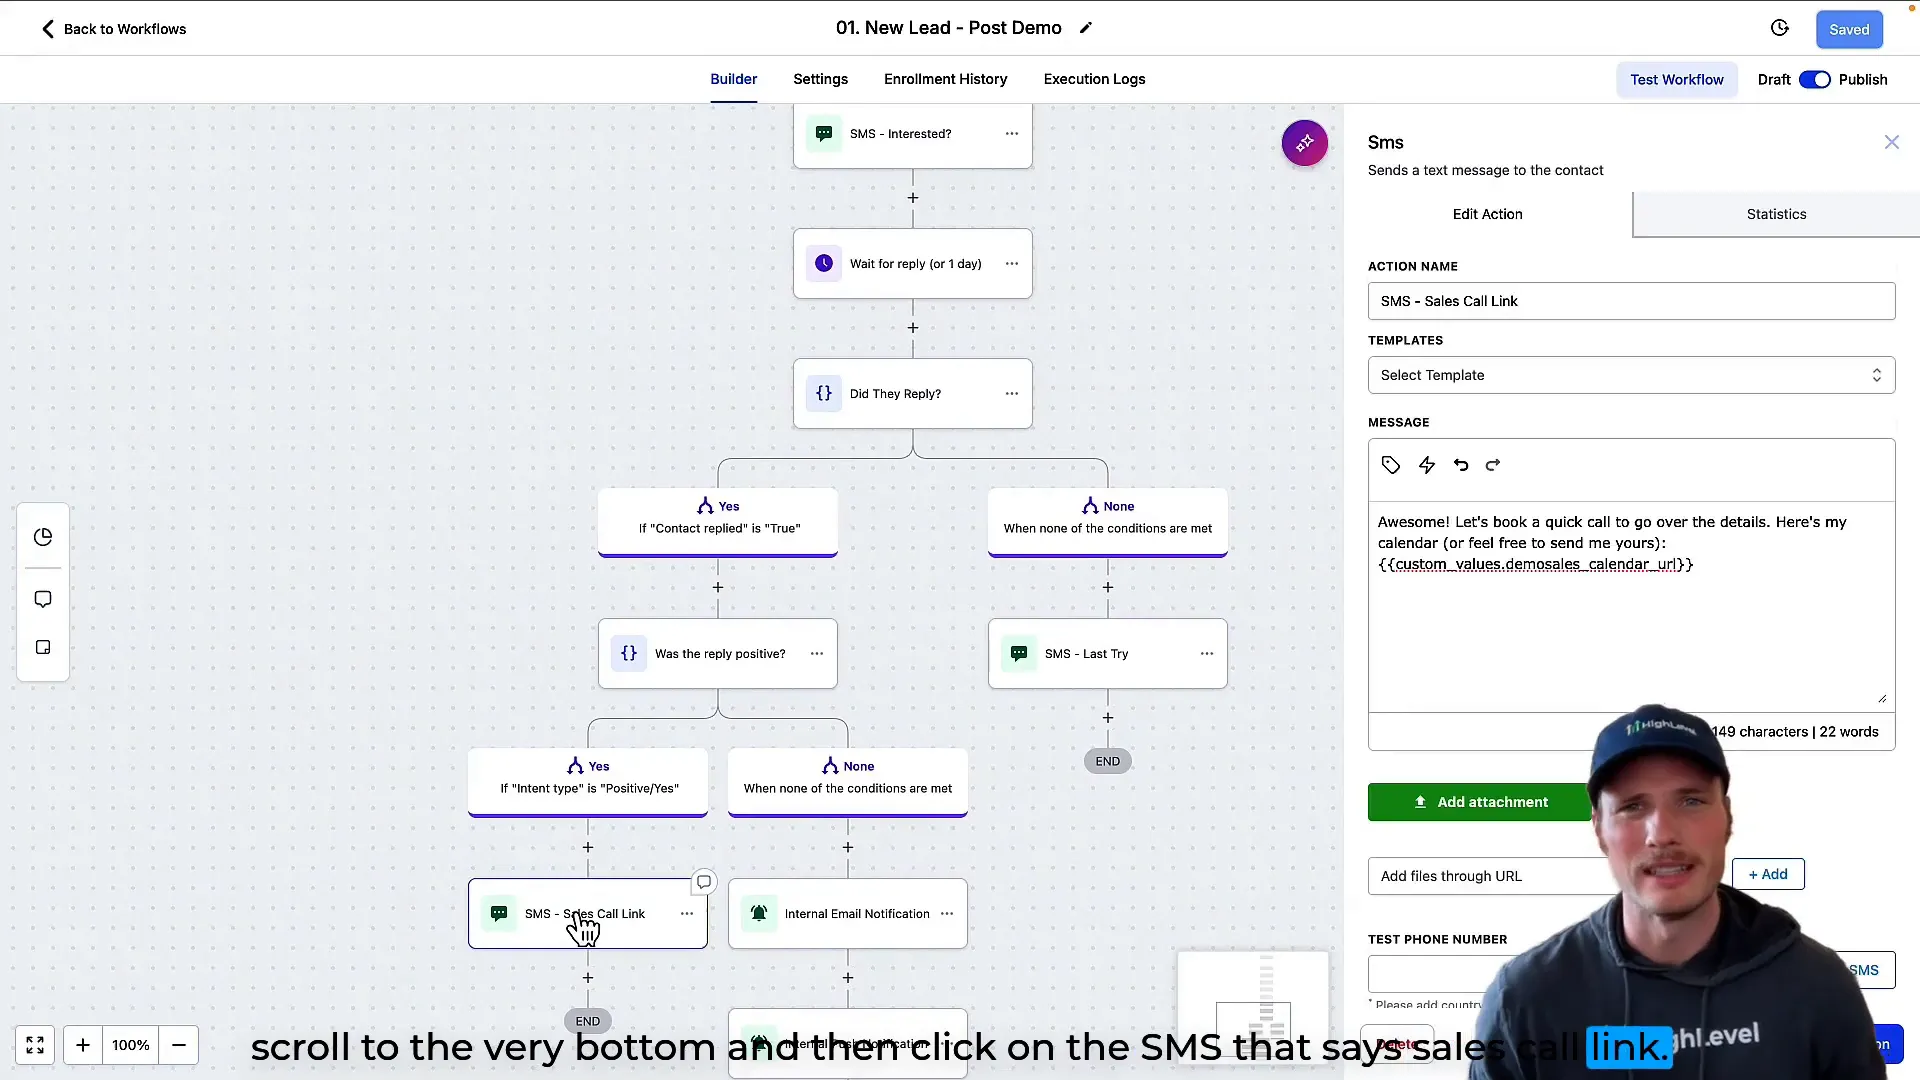
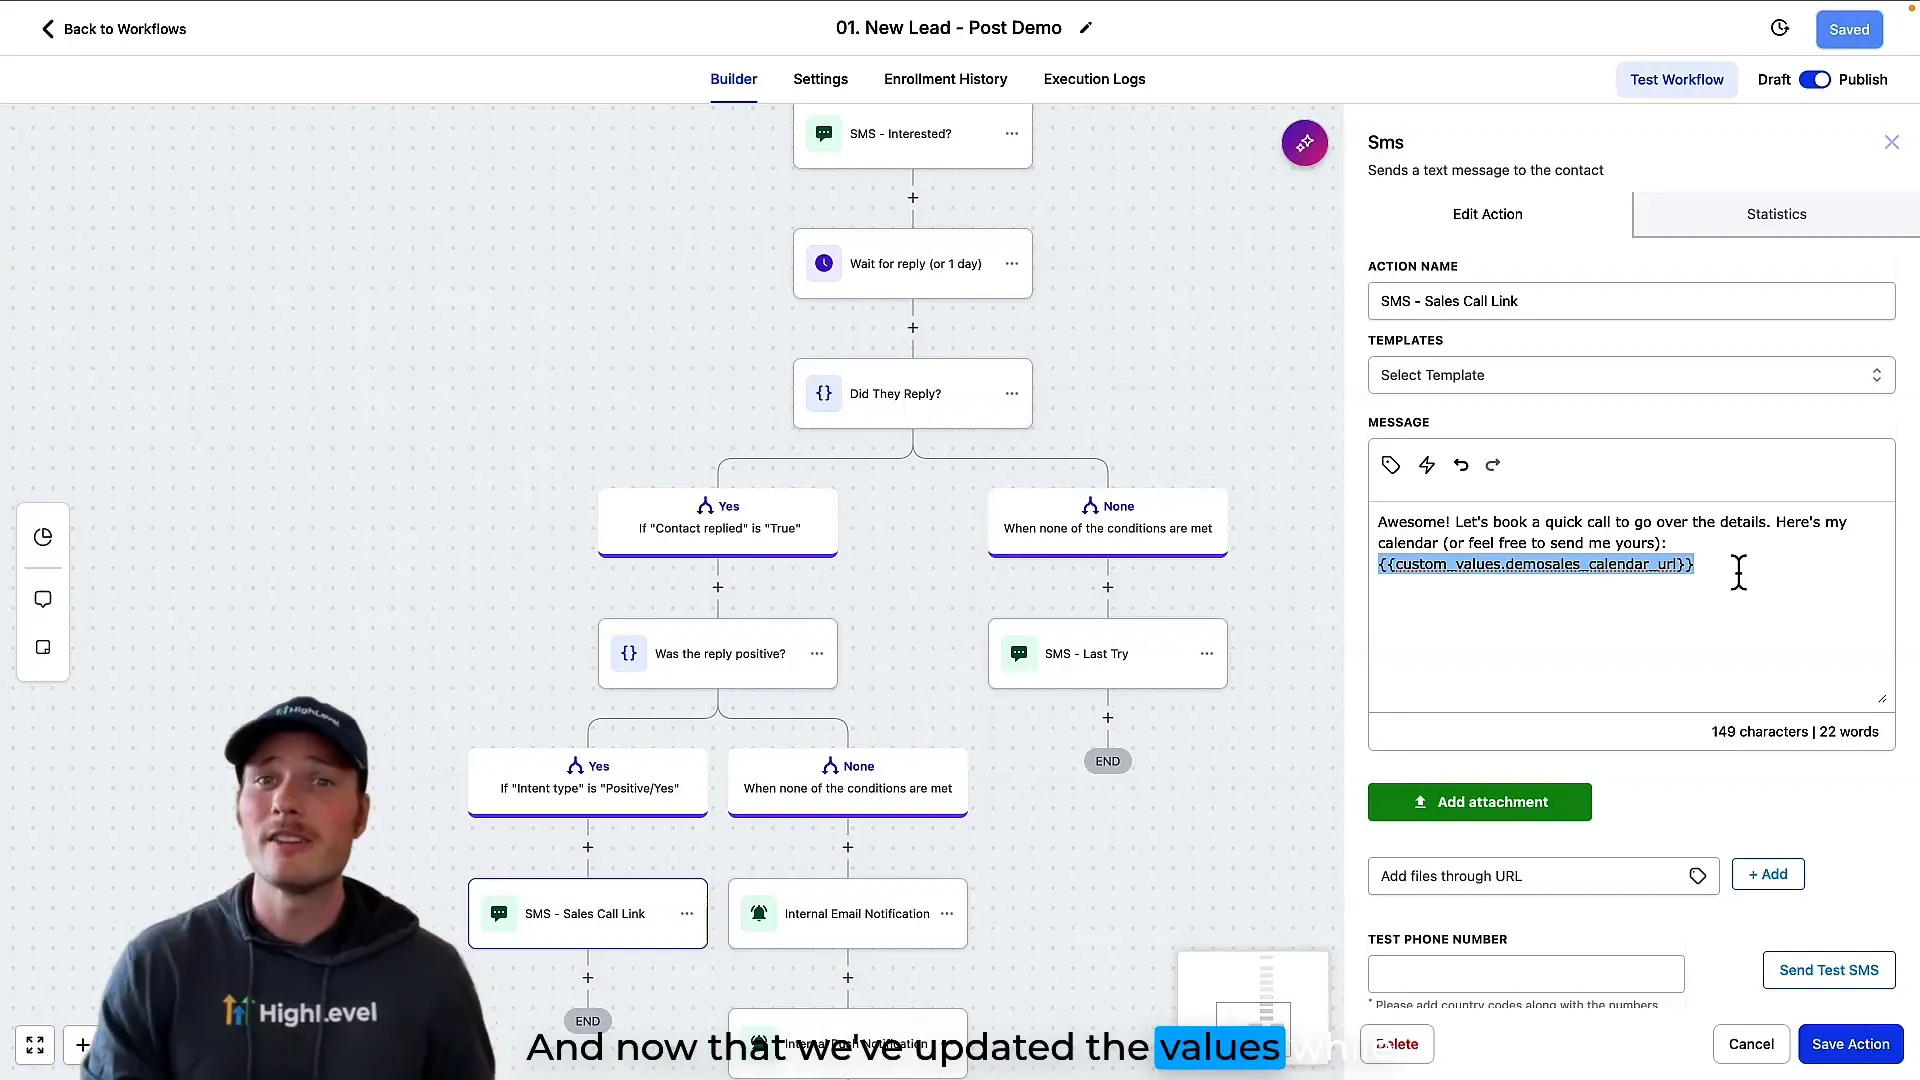
For example, there is an automation workflow called New Lead Post Demo. This workflow triggers immediately after a prospect demos one of your VoiceAI agents. At the end of the workflow, an SMS is sent inviting the prospect to book a sales call.
Instead of hardcoding the sales calendar link into the SMS, the workflow references the custom value you updated earlier. This means if you ever change your sales calendar URL, you only update the custom value once, and every SMS sent by this workflow automatically has the correct link.
How This Benefits You
- Consistency: All communications use the same up-to-date links and contact info.
- Efficiency: Update once, and the change propagates everywhere.
- Scalability: Easily manage multiple pages, phone numbers, and meeting links as your team grows.
Step 7: Customize Your Website Smartly Using Custom Values
Updating your website with custom values is a game changer. Instead of manually editing every text box or link on your website, you use placeholders that pull from your custom values.
For instance, your homepage might have a placeholder for the phone number or the sales calendar link. When you update those custom values, your website content updates automatically. This means you can launch your website faster and make future changes in seconds.
The same applies to merge fields like your business name, location, or other details stored in your business profile in Lead Connector. You’ll recognize these merge fields by the squiggly brackets around them, such as {{business_name}}.
Putting It All Together: The Power of Lead Connector With GFunnel
With your six key custom values updated — homepage URL, demo sales calendar URL, onboarding page URL, phone number, onboarding Zoom link, and sales Zoom link — you’ve set the foundation for a powerful, automated business ecosystem.
Lead Connector (GFunnel) empowers you to centralize your business data and automate your marketing and sales processes with ease. Custom values are the linchpin that connects your website, automations, and communication channels.
By updating these values once, you maintain control and ensure every touchpoint your prospects encounter is accurate and professional. This reduces friction, improves customer experience, and ultimately helps you close more deals.
If you want to dive deeper into automations, workflows, and advanced customization, check out our automation resources and courses to master the full capabilities of Lead Connector.
Frequently Asked Questions (FAQ)
What exactly are custom values in Lead Connector?
Custom values are dynamic placeholders where you store important URLs, phone numbers, or other business details. These values are referenced throughout your website, automations, and communications to ensure consistency and easy updating.
How do I connect my domain to my Lead Connector website?
In your agency subaccount, go to Sites > Websites, select your website template, go to Settings, and choose your domain from the top right corner. Save your settings, and your domain will be attached to your website.
Can I use meeting platforms other than Zoom for sales and onboarding calls?
Absolutely! The custom values for sales and onboarding call links accept any URL. You can use Google Meet, ScheduleOnce, or any other scheduling tool you prefer.
Why should I use custom values instead of hardcoding links in messages?
Using custom values ensures that when you update a link or phone number once, all references throughout your automations and website update automatically. This saves time, reduces errors, and keeps your marketing consistent.
Can I have different phone numbers or meeting links for different teams?
Yes, you can create different custom values for each team or function and reference them accordingly in your automations and website content. This is especially useful as your business grows and you add sales reps, onboarding teams, or support staff.
Where can I learn more about automations and workflows in Lead Connector?
Explore the automation home and courses on GFunnel to deepen your knowledge and skills in creating powerful workflows that save time and increase conversions.
Additional Resources
- Get started with Lead Connector (GFunnel)
- Learn about automation in Lead Connector
- Explore courses to master Lead Connector
- Discover CRM features with Lead Connector
By following these steps and embracing the power of custom values, you’ll be well on your way to building a scalable, automated business with Lead Connector (GFunnel). Start today, and watch your marketing and sales workflows transform into well-oiled machines that work for you 24/7.


