In this blog, we will explore the essential aspects of creating and managing workflows in Lead Connector. Workflows In Lead Connector serve as the backbone of automating your business processes, enabling you to streamline operations and enhance productivity.
Introduction to Workflows In Lead Connector
Workflows in Lead Connector are essential for automating your business processes. They enable you to streamline tasks, save time, and enhance productivity. By utilizing workflows, you can create efficient systems that handle repetitive tasks automatically, allowing you to focus on more important aspects of your business.
As you get started, it’s crucial to understand the foundational elements that make up workflows in Lead Connector. This section will guide you through the basics, ensuring you have a solid grasp of how to leverage this powerful tool.
Navigating Your Lead Connector Account
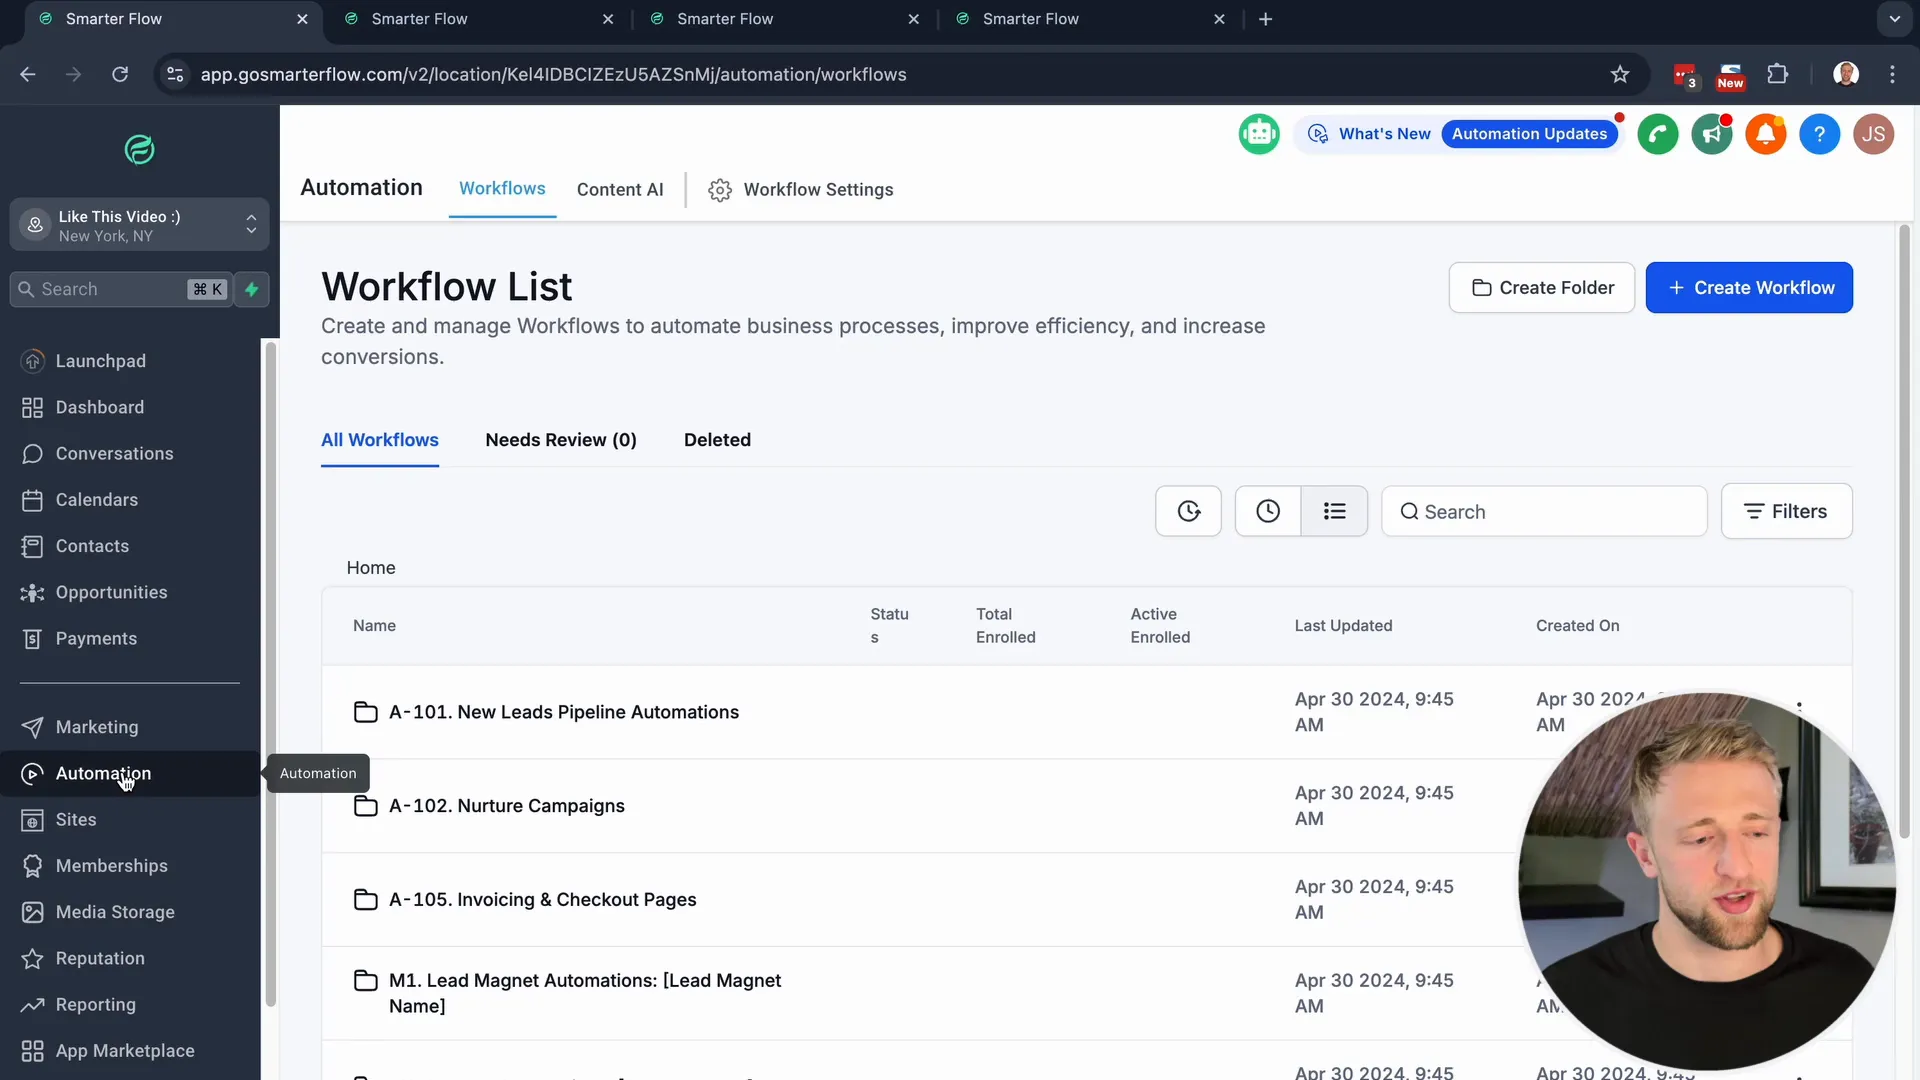
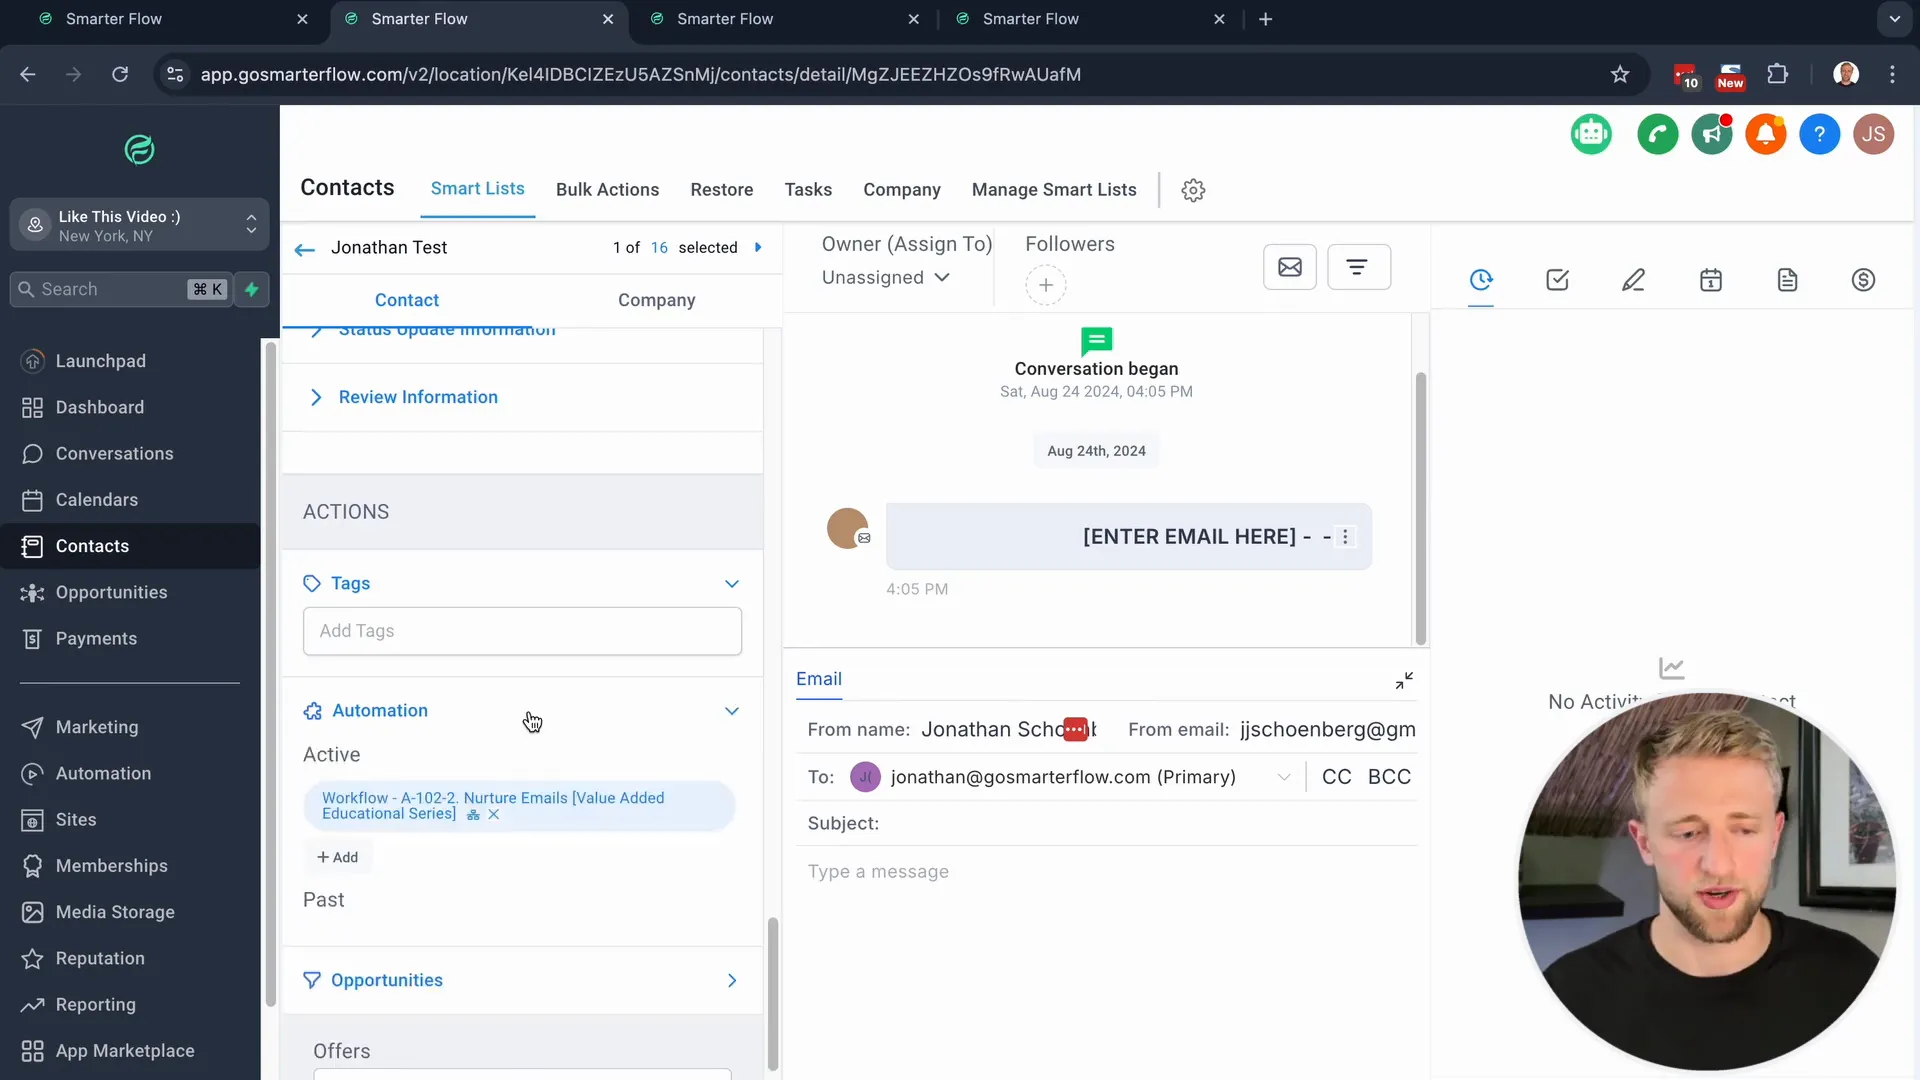
When you first log into your Lead Connector account, the dashboard will greet you with various options. Familiarize yourself with the layout, focusing on the automations section. This is where the magic happens.
Click on the "Automations" tab to access your workflow list. Here, you’ll find existing workflows and options to create new ones. Understanding this interface is vital for efficient navigation and management of your workflows.
Organizing Your Workflows with Folders
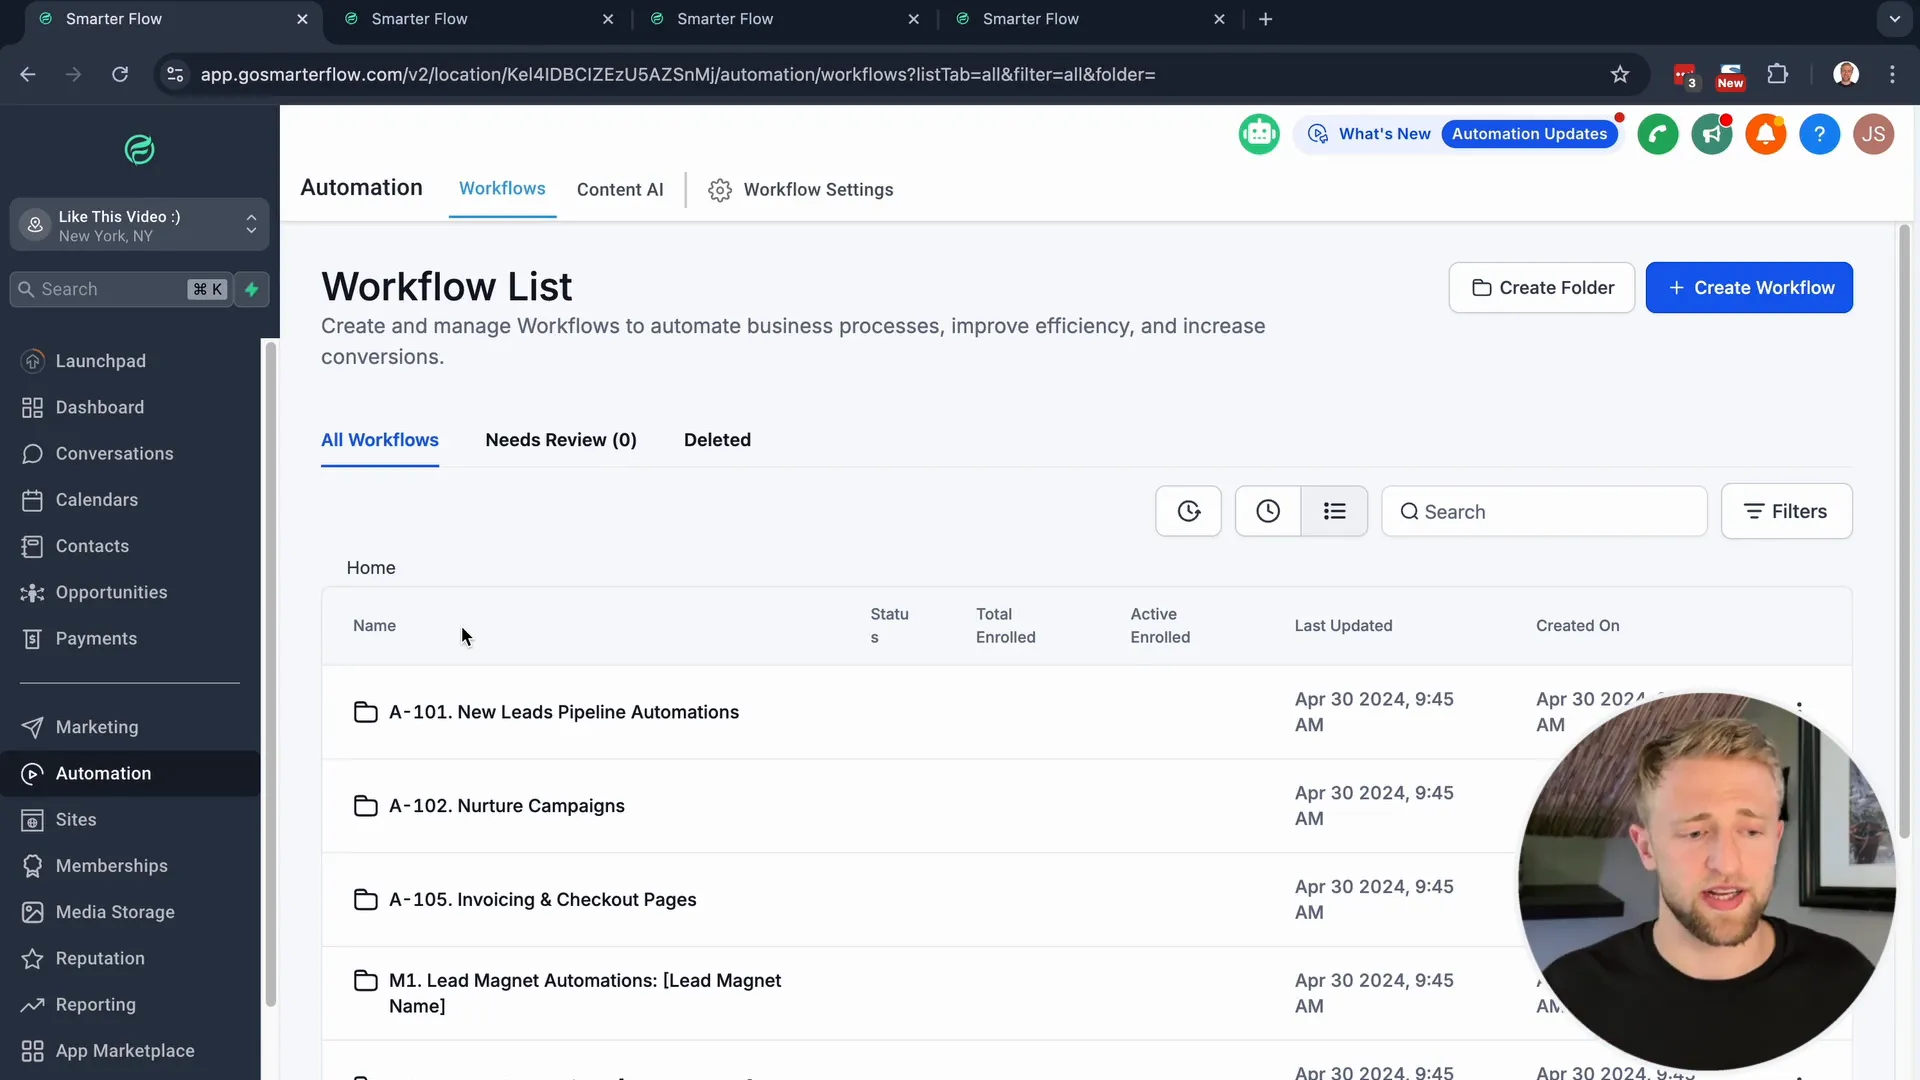
To keep your workflows manageable, it’s advisable to create folders. Organizing workflows into folders helps maintain a clean and efficient workspace. Each folder can contain specific automations related to a particular project or function.
For instance, you might create folders for "Nurture Campaigns," "Invoices," and "Checkout Pages." This categorization not only streamlines your workflow but also makes it easier to locate specific automations when needed.

Creating a Naming Convention for Workflows
A consistent naming convention is vital for organization. When naming your workflows, consider including descriptive identifiers that reflect the function or purpose of the automation. For example, a workflow for email follow-ups could be named "FollowUp_Email_Campaign."
This practice not only aids in quick identification but also prevents confusion as your list of workflows grows. A well-structured naming method will save you time in the long run.
Understanding Triggers in Workflows
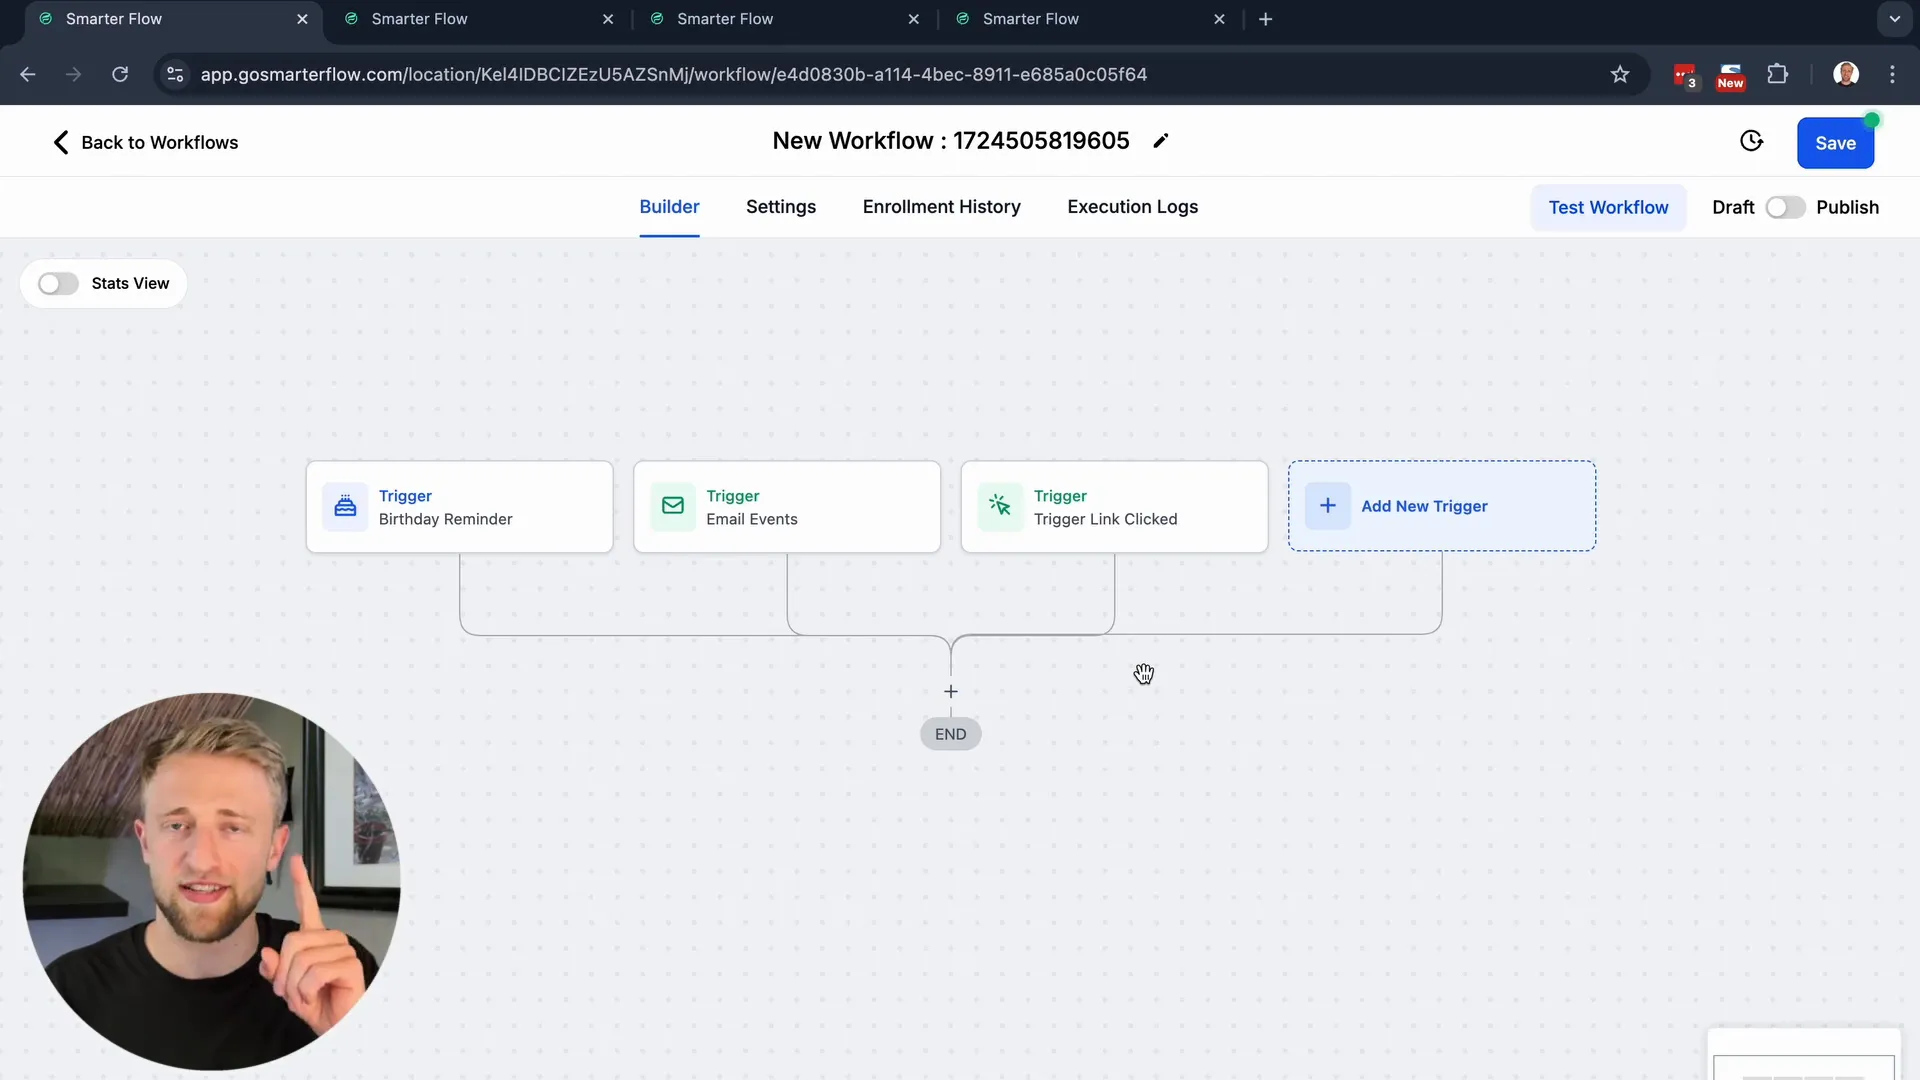
Triggers are the backbone of any workflow in Lead Connector. They initiate actions based on specific events or conditions. Understanding how to effectively use triggers is crucial for building efficient workflows.
Common triggers include contact creation, form submissions, and appointment bookings. Each trigger can lead to a series of automated actions, allowing you to respond instantly to customer interactions.
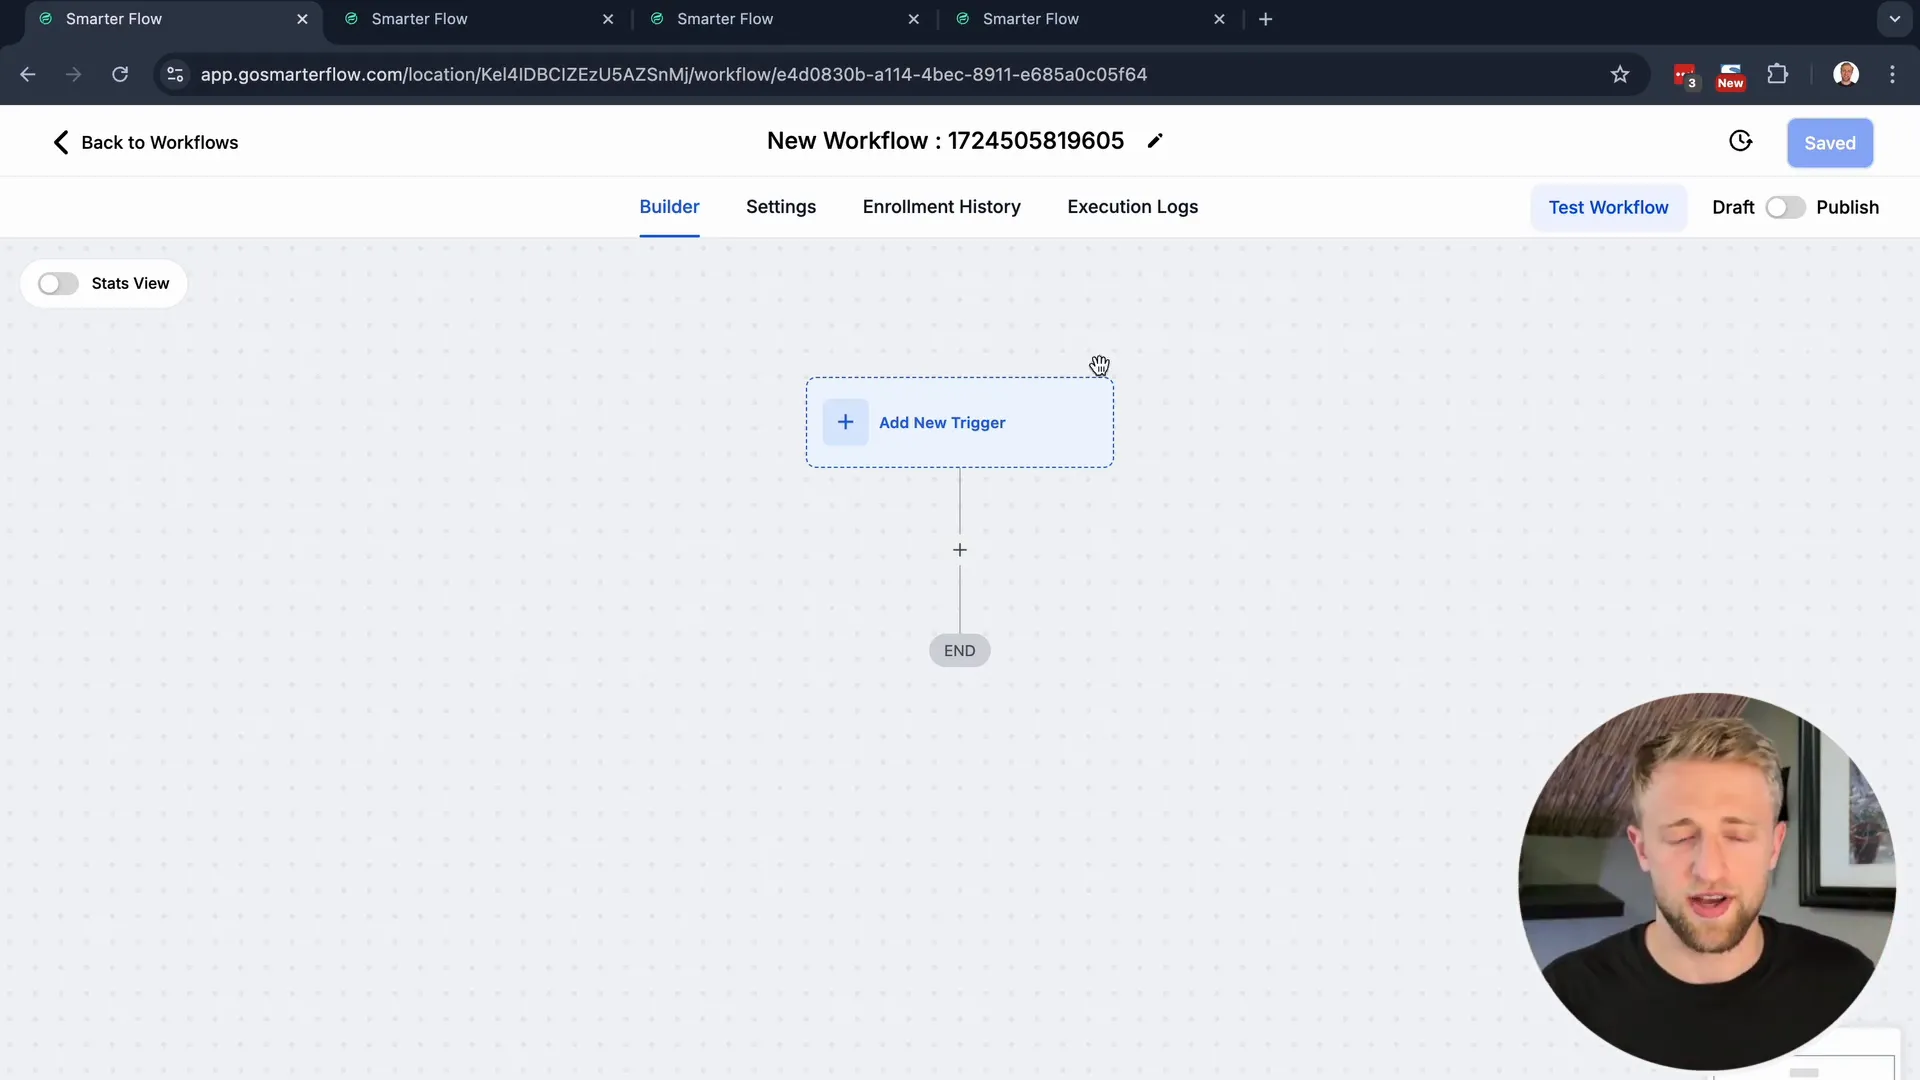
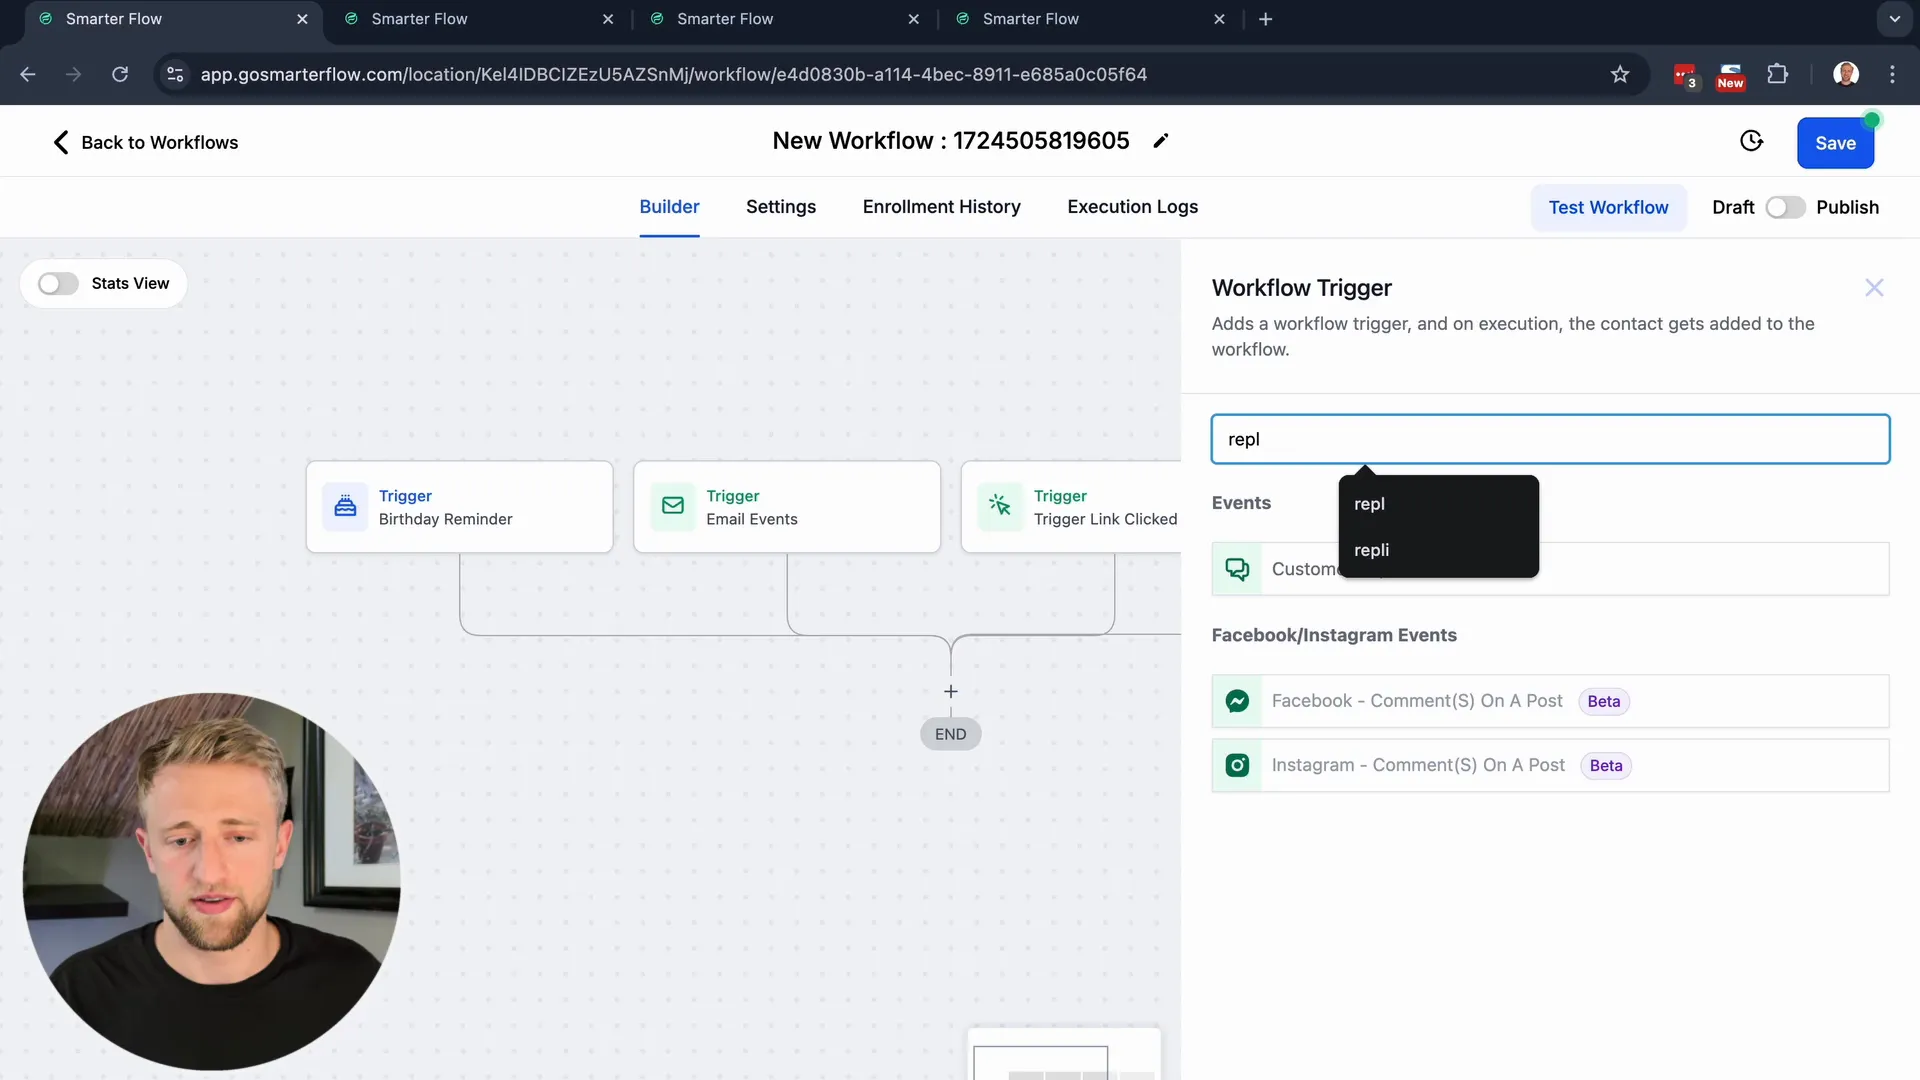
How to Add and Manage Triggers
To add a trigger, navigate to the triggers section within your workflow. You can select from a variety of available triggers tailored to your needs. Adding multiple triggers to a single workflow is possible, allowing for complex automation scenarios.
Once added, you can manage these triggers easily. Review their settings, modify them as necessary, and ensure they align with your workflow goals. Regularly revisiting and refining your triggers will enhance the effectiveness of your automations.
Actions vs. Triggers: What You Need to Know
Understanding the distinction between actions and triggers is crucial for maximizing the effectiveness of your workflows in Lead Connector. Triggers initiate workflows based on specific events, while actions are the tasks that follow those triggers.
For instance, if a contact fills out a form (trigger), you might want to send them a welcome email (action). Familiarizing yourself with this concept allows you to create more targeted and effective workflows.
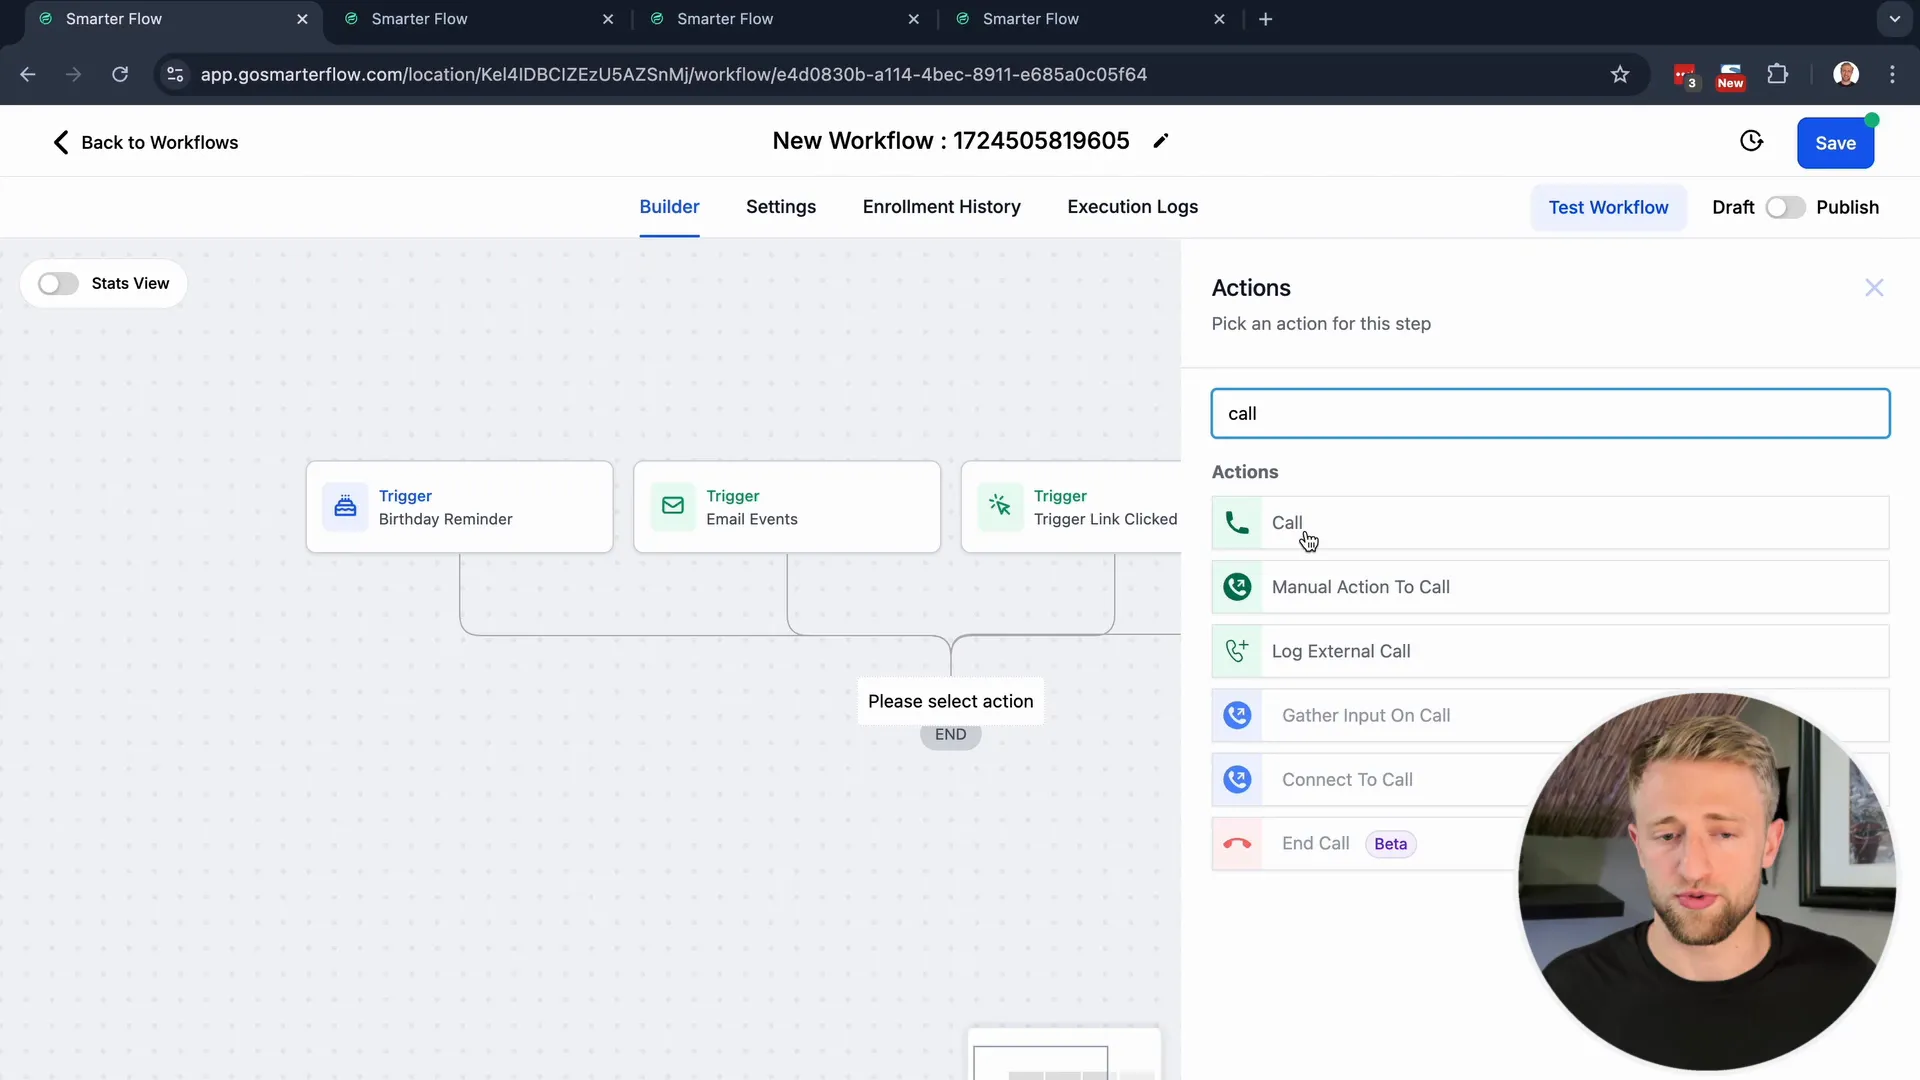
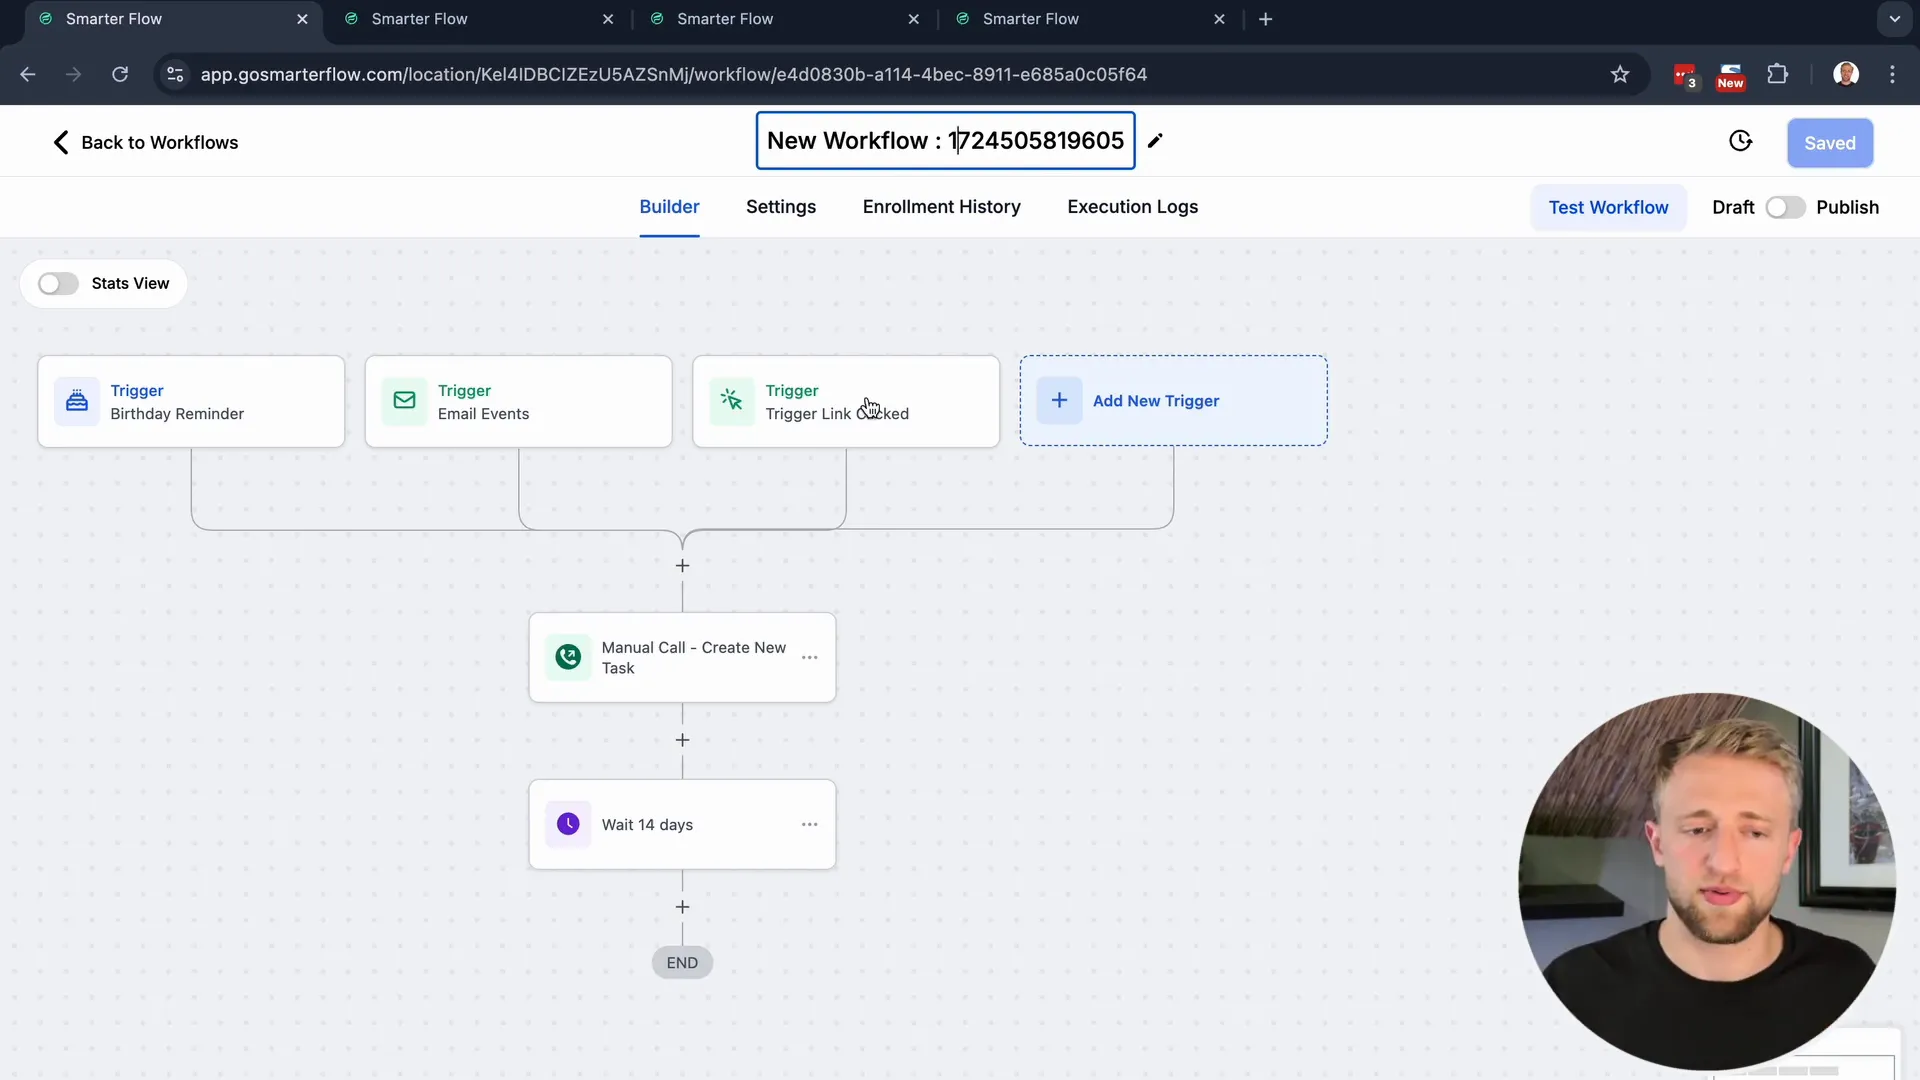
Creating Actions in Your Workflow
Creating actions within your workflows is straightforward. Start by selecting the desired action from the list. Actions can include sending emails, creating tasks, or logging calls. Each action can be customized to suit your business needs.
For example, you can set up a manual call action that prompts your team to reach out to a contact after they engage with your marketing materials. This personal touch can significantly enhance customer experience.
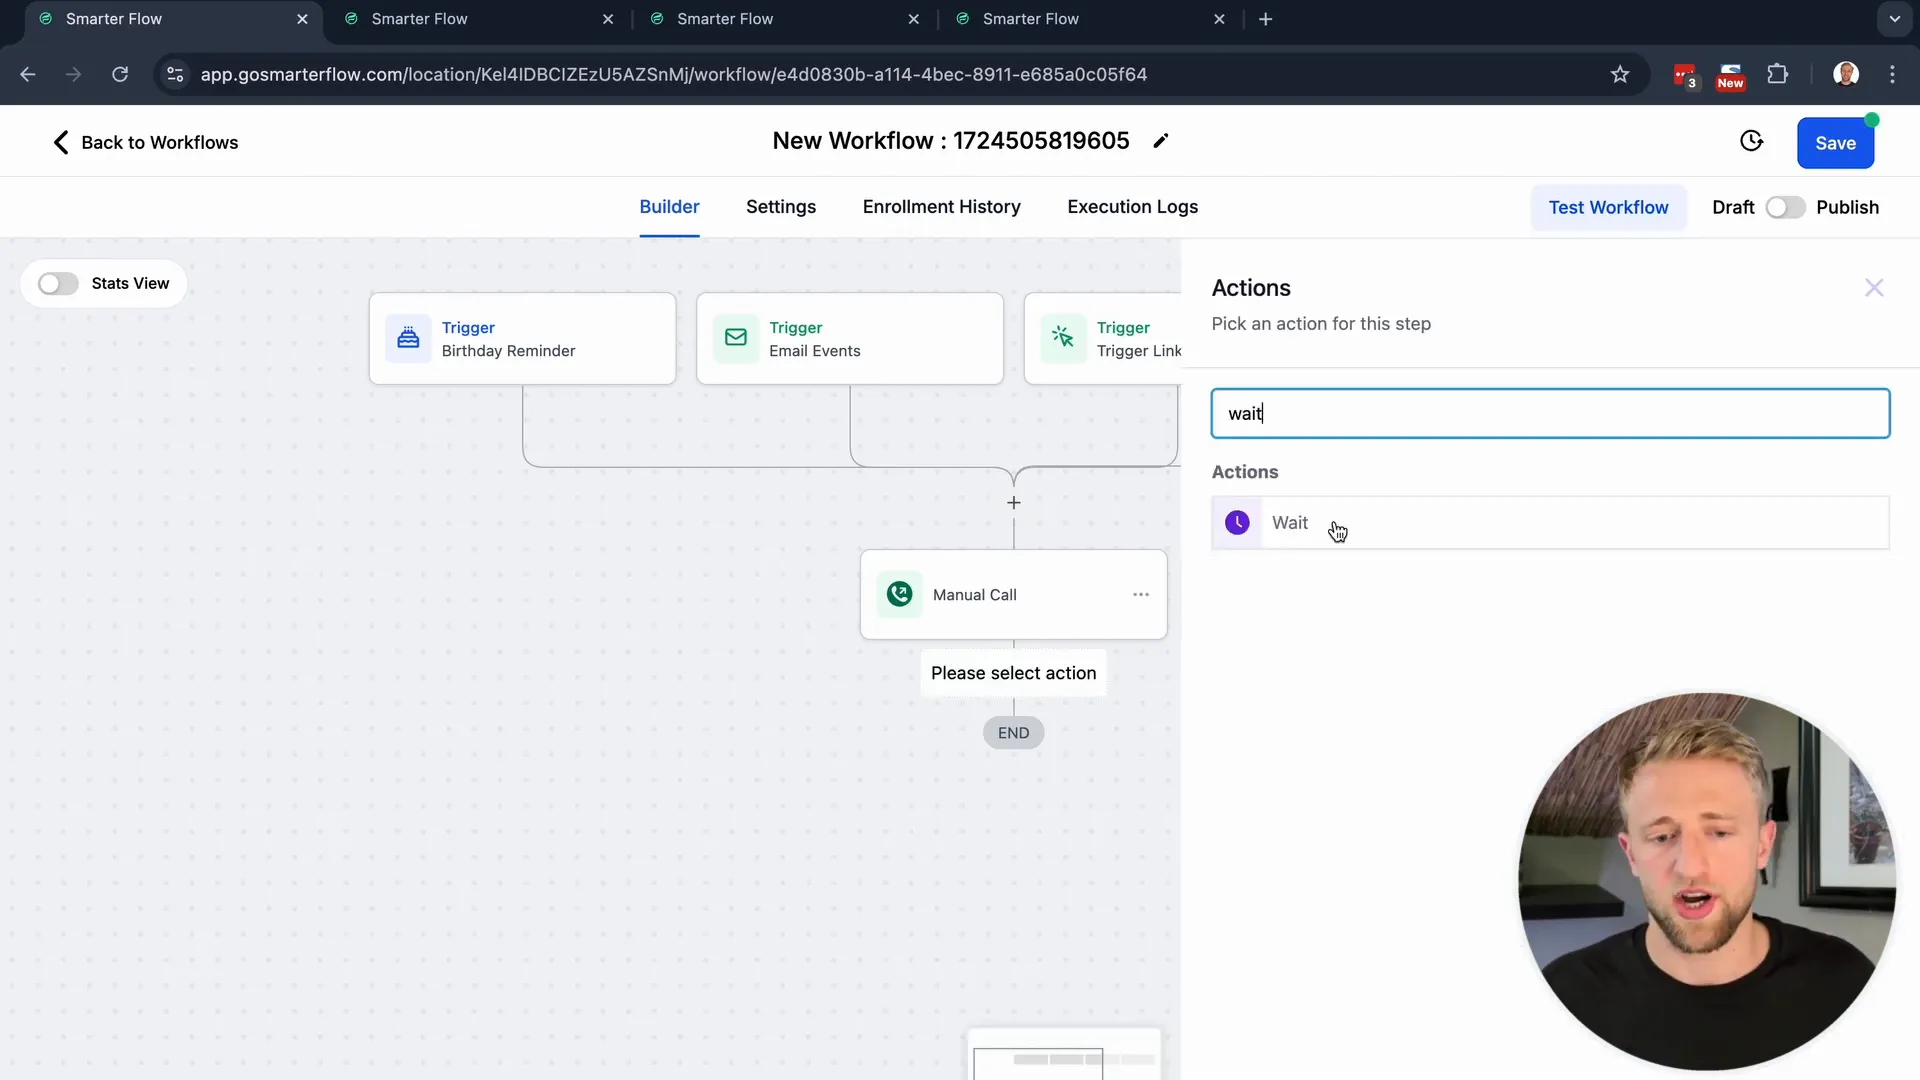
Utilizing Wait Steps for Timing Automation
Wait steps are an essential feature in Lead Connector workflows. They allow you to pause the workflow for a specified duration before proceeding with the next action. This can be particularly useful for follow-ups after an initial customer interaction.
For example, if a contact receives a welcome email, you might want to wait a few days before sending them a follow-up message. This strategy helps maintain engagement without overwhelming your contacts.
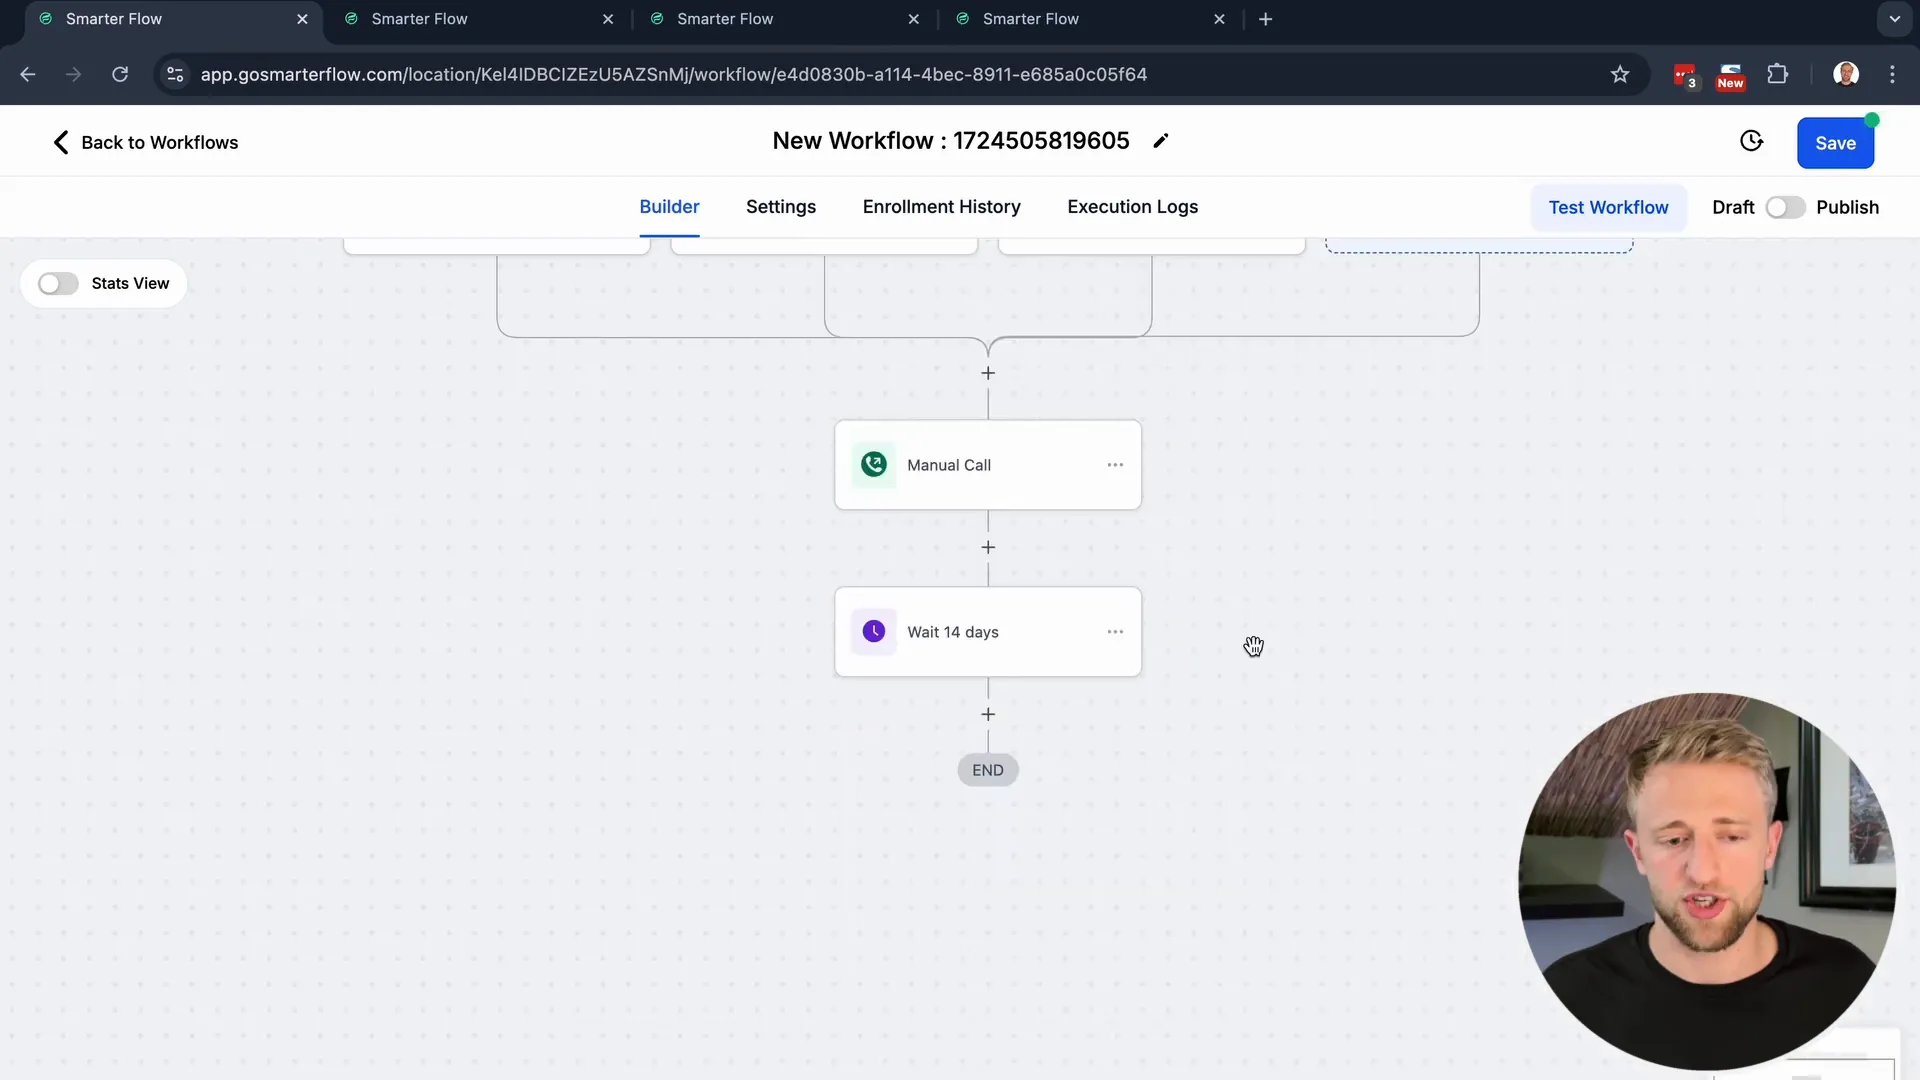
Renaming and Customizing Workflow Steps
Customizing your workflow steps enhances clarity and organization. Each action and trigger can be renamed to reflect its purpose more accurately. For instance, instead of "manual call," you could rename it to "Follow-Up Call" for better context.
This practice not only aids in quick identification but also helps team members understand the workflow at a glance, reducing confusion and improving collaboration.
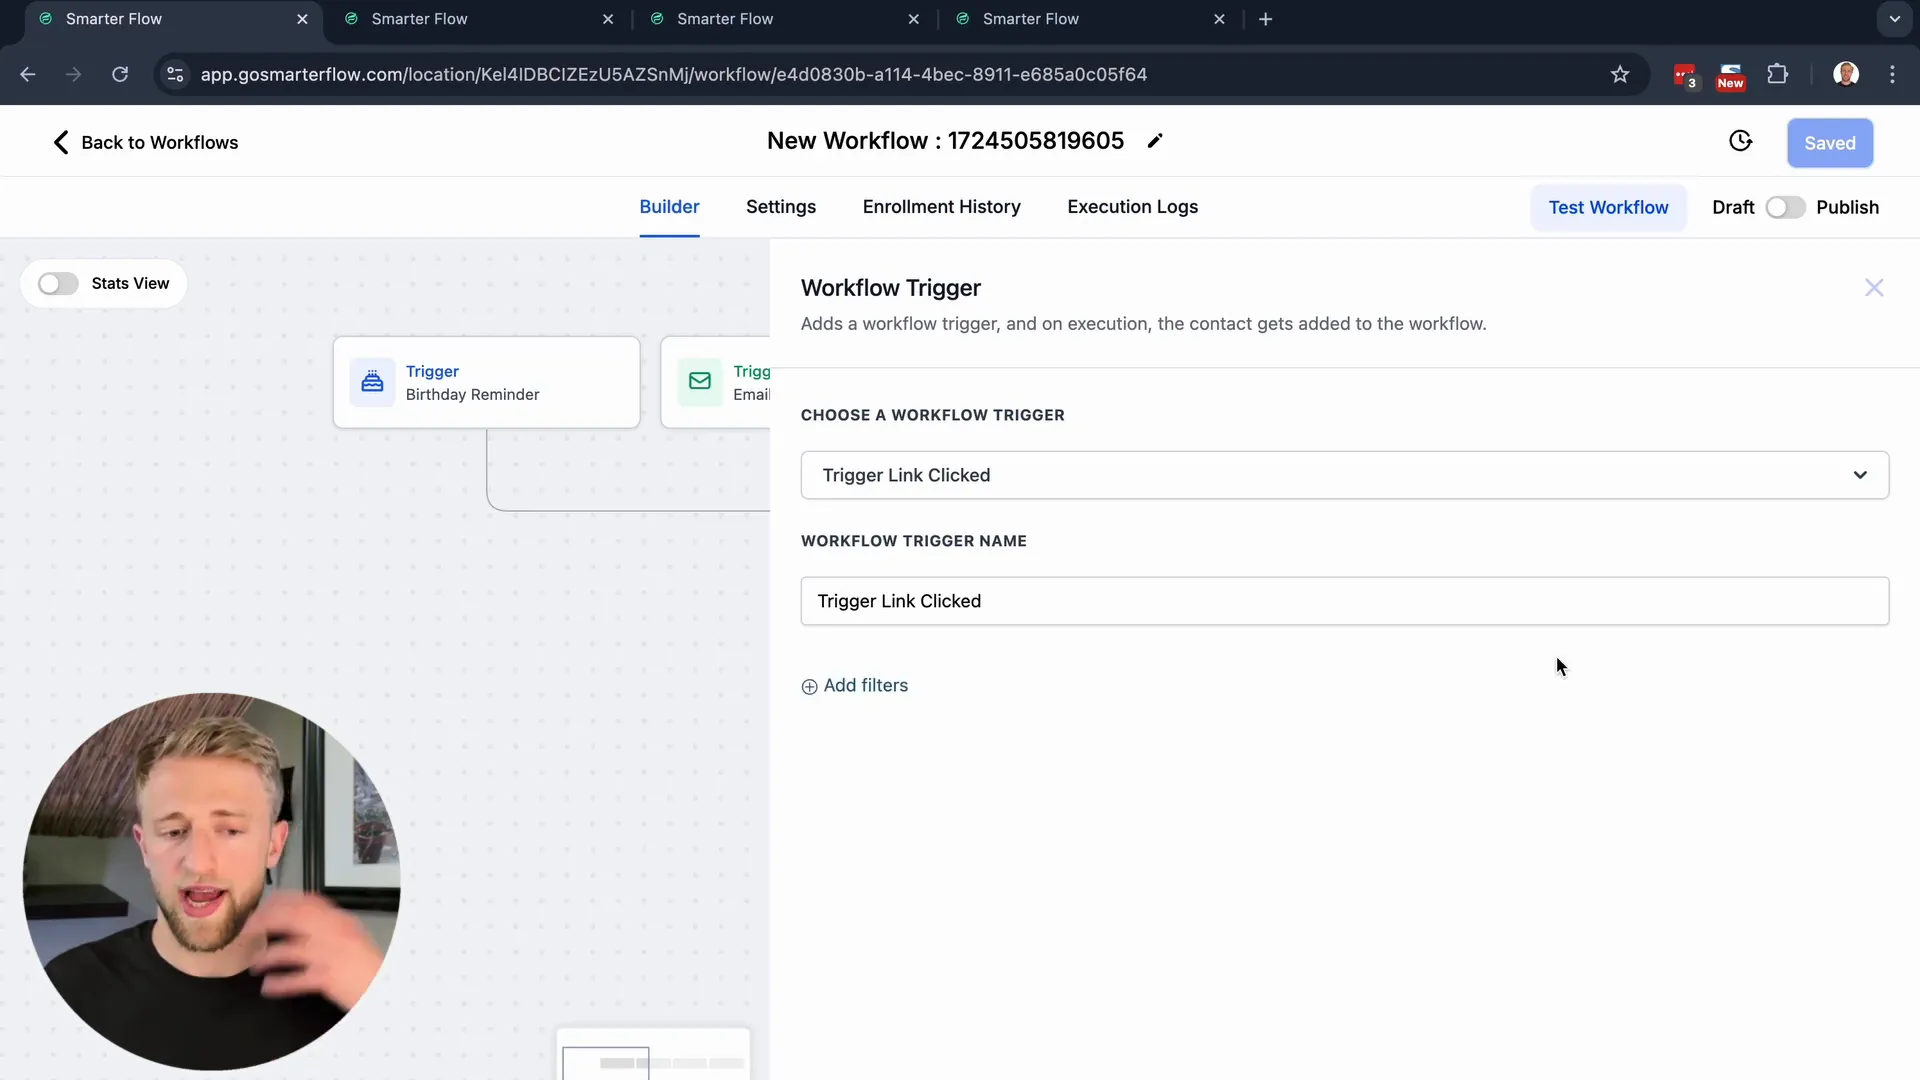
Setting Up Filters for Triggers
Filters are powerful tools that refine how triggers operate within your workflows. By applying filters, you can ensure that specific actions only occur under certain conditions. This level of specificity increases the effectiveness of your automations.
For instance, you might set a filter so that a workflow only triggers when a contact clicks a specific link in an email. This targeted approach ensures that your communications are relevant and timely.
Duplicating Workflows for Efficiency
Efficiency is key in workflow management, and duplicating workflows can save you significant time. If you have a successful workflow, you can easily create a copy and modify it for a different campaign or audience.
This feature allows you to maintain consistency across your processes while minimizing the time spent on setup. With Lead Connector, you can quickly adapt and expand your automation strategies without starting from scratch.
For more insights on optimizing your marketing processes, check out our automation resources. Understanding how to leverage these tools effectively can transform your business operations.
Using Recipes to Simplify Workflow Creation
Recipes in Lead Connector are pre-built workflows designed to streamline your automation process. They serve as templates, allowing you to jumpstart your workflow creation without starting from scratch. By utilizing these recipes, you can save time and effort, ensuring your workflows are built on proven frameworks.
For instance, if you're looking to set up appointment confirmations or reminders, simply select the relevant recipe from the library. Once you choose a recipe, you can customize it to fit your specific business needs, adding or modifying triggers and actions as necessary.
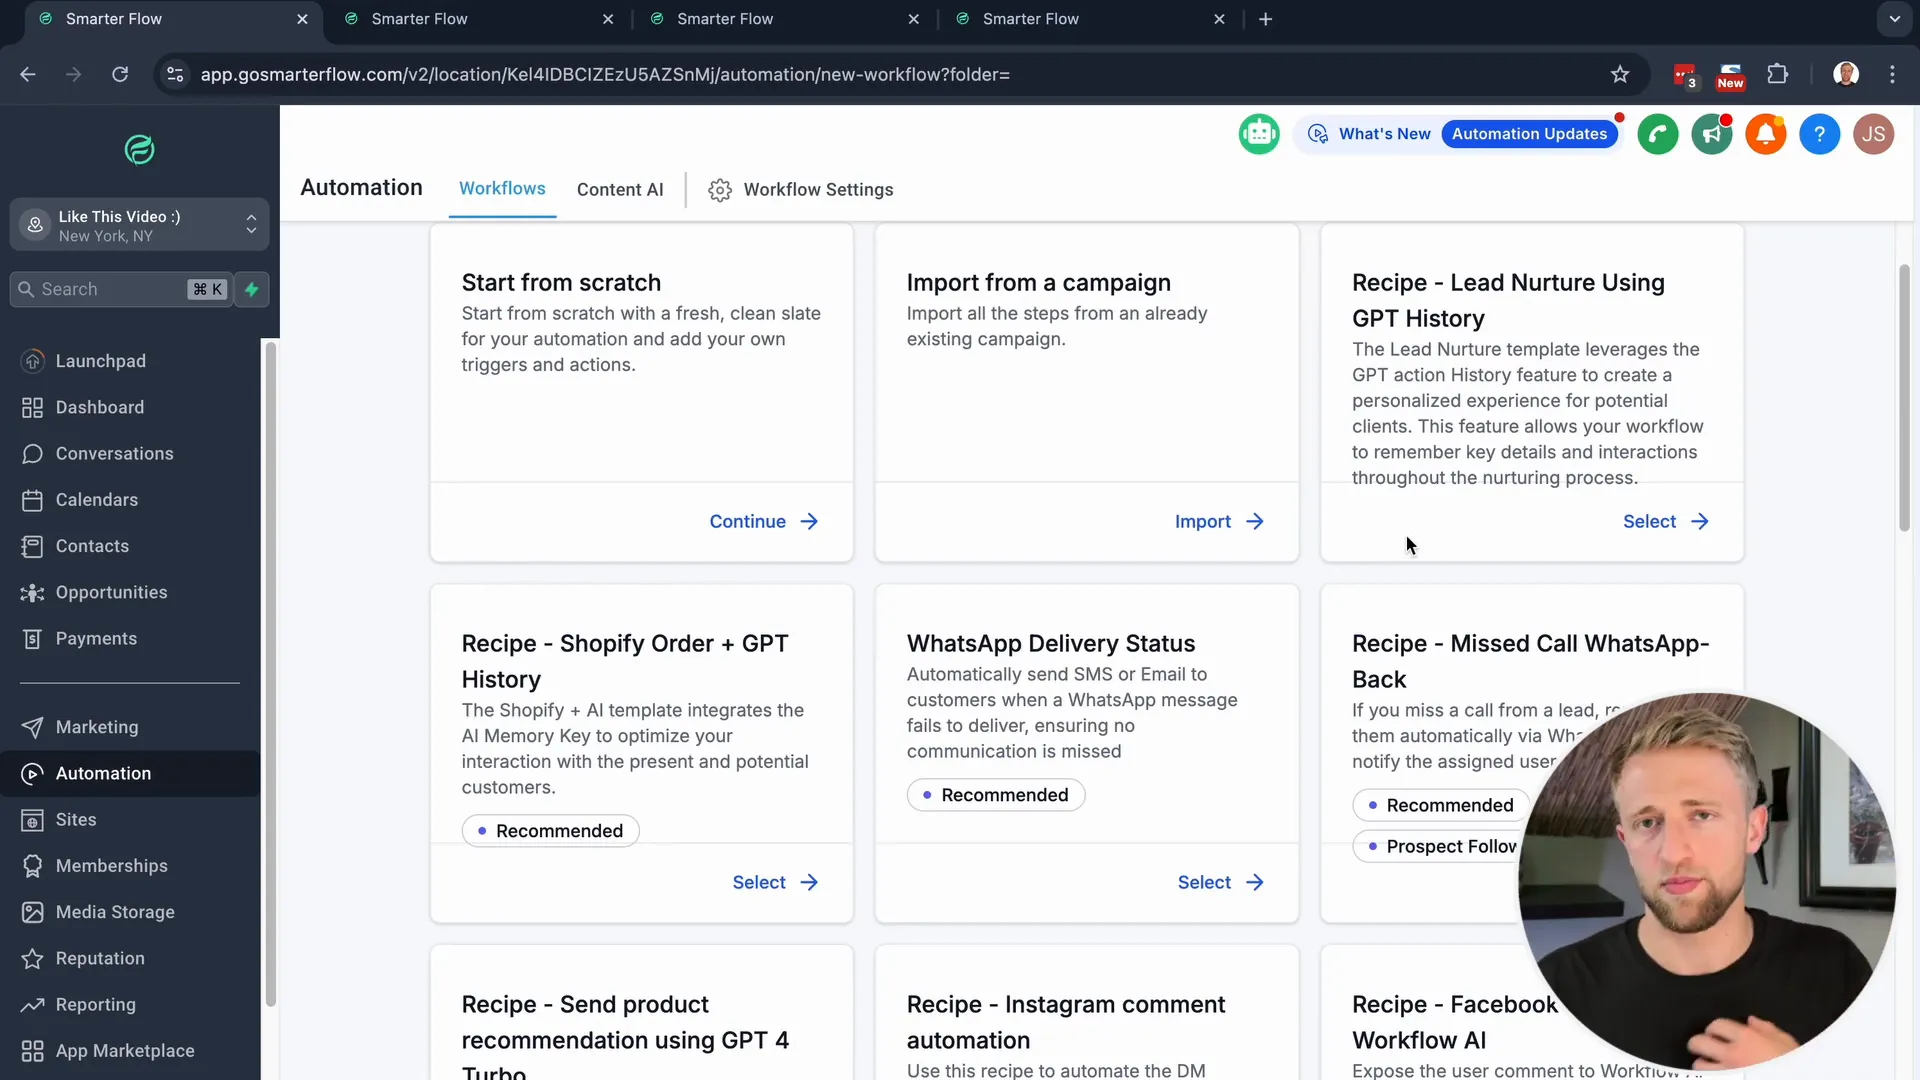
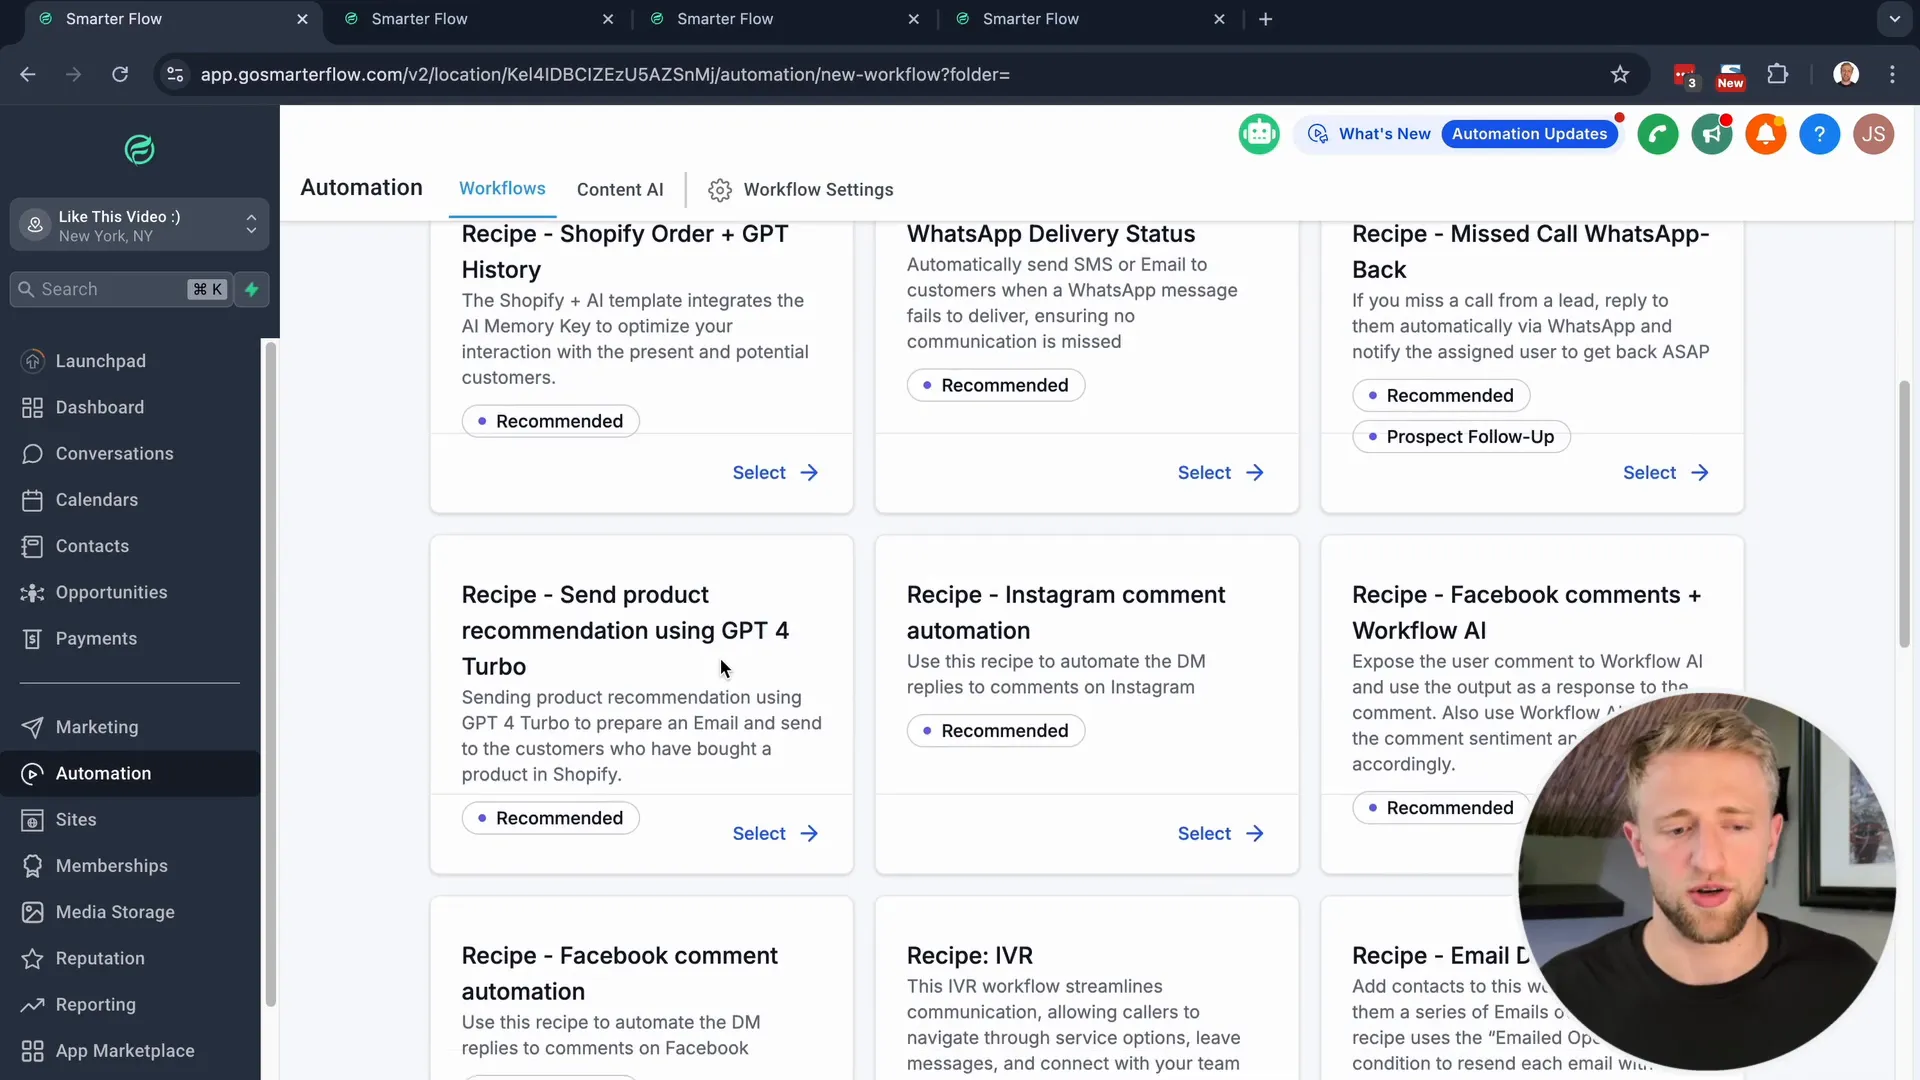
Moreover, recipes can inspire your own unique workflows. By examining how different recipes are structured, you can learn best practices and innovative strategies for your own automations. This exposure can help you think creatively and build more effective workflows tailored to your business objectives.
Remember to explore new recipes regularly, as Lead Connector frequently updates its library with fresh options that may incorporate advanced features or leverage AI capabilities. This ensures that your workflows can evolve alongside your business needs.
Testing Your Workflows Before Launch
Before rolling out any workflow, thorough testing is essential. This step ensures that all triggers and actions function as intended. In Lead Connector, you can test your workflows in a few simple ways.
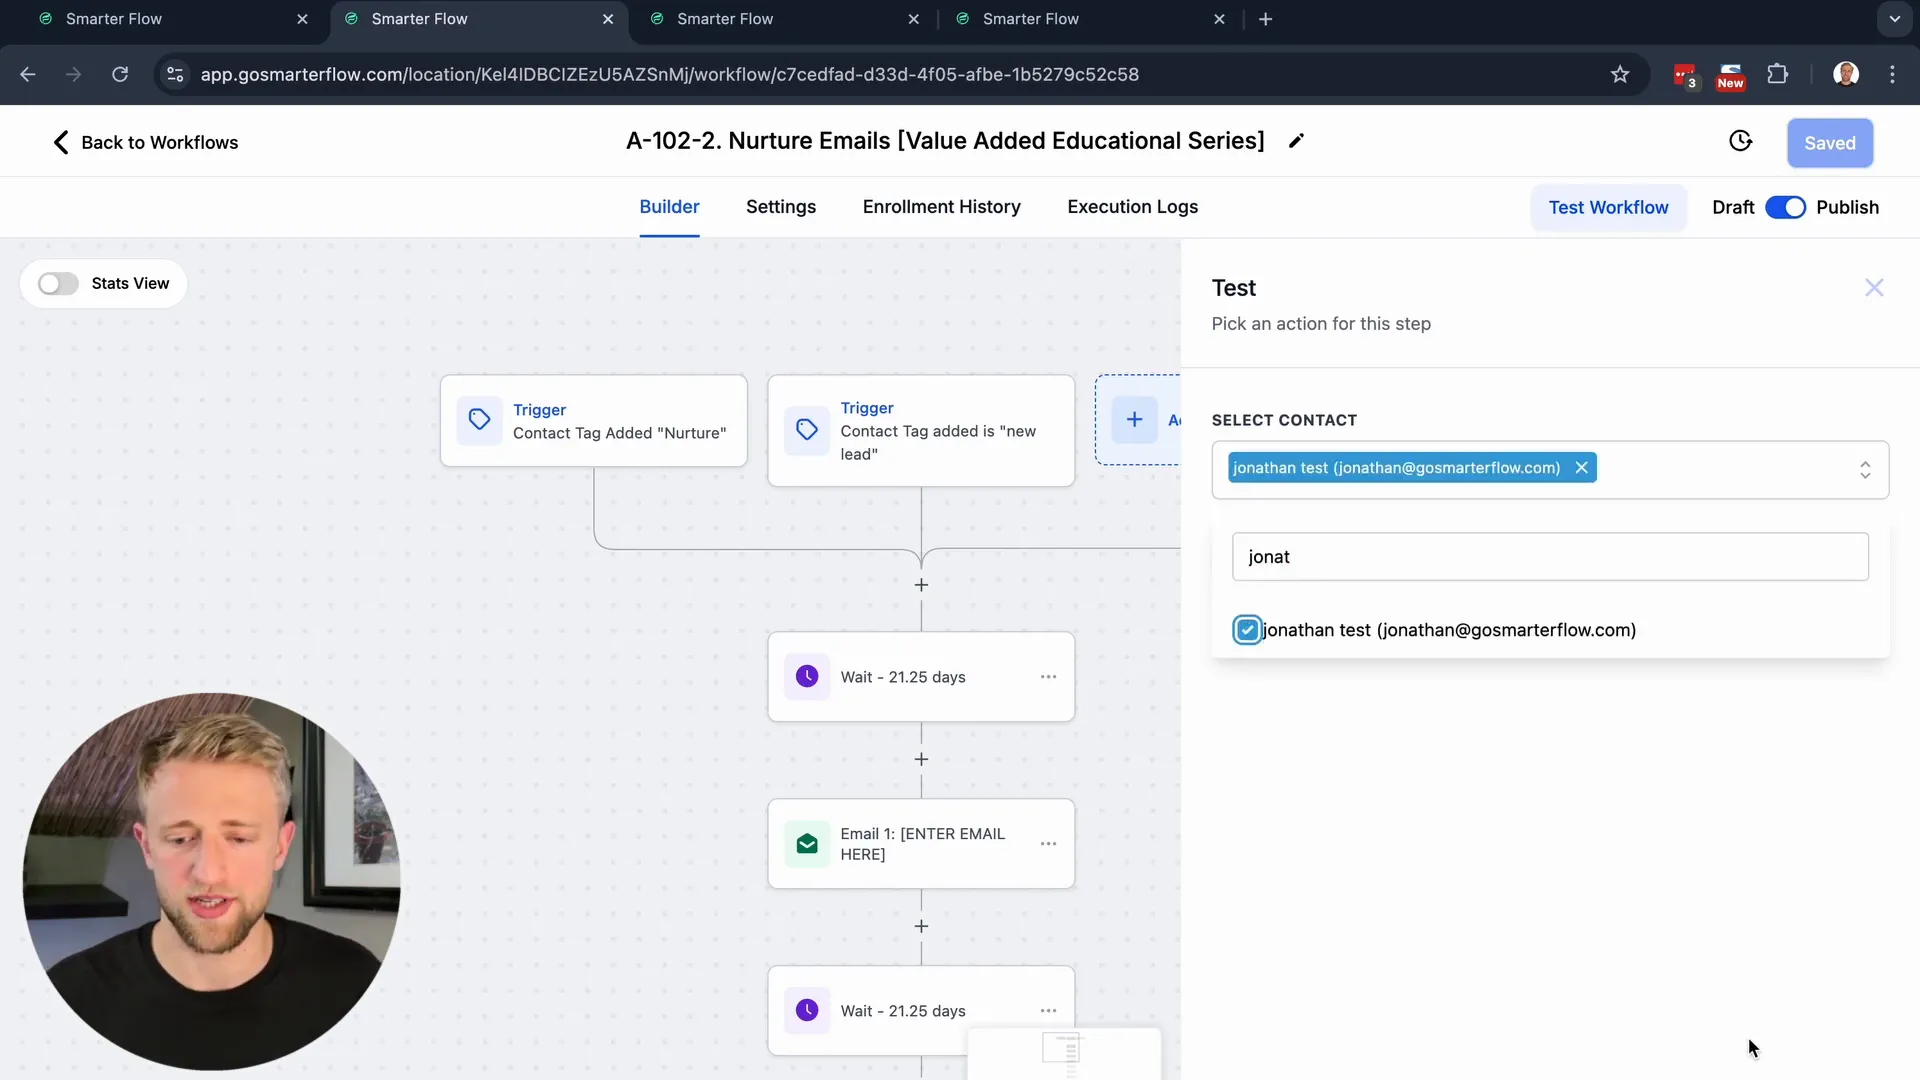
First, utilize the "Test Workflow" feature, which allows you to simulate the workflow without affecting actual contacts. This feature is particularly useful for identifying any issues with triggers or actions before they go live. You can also use test emails to see how communications will appear to your clients.

It's also beneficial to manually trigger workflows using test contacts to observe their behavior in real-time. This method helps you experience the entire workflow from start to finish, ensuring that every element functions as expected. Pay attention to timing, content, and the overall flow to guarantee a seamless experience for your actual contacts.
Understanding Enrollment History and Execution Logs
Once your workflows are live, it's important to monitor their performance. Lead Connector provides tools like Enrollment History and Execution Logs to give you insights into how your workflows are functioning.
Enrollment History allows you to see which contacts have entered your workflows, along with timestamps and current statuses. This feature is vital for understanding engagement and ensuring that your workflows are reaching the intended audience.
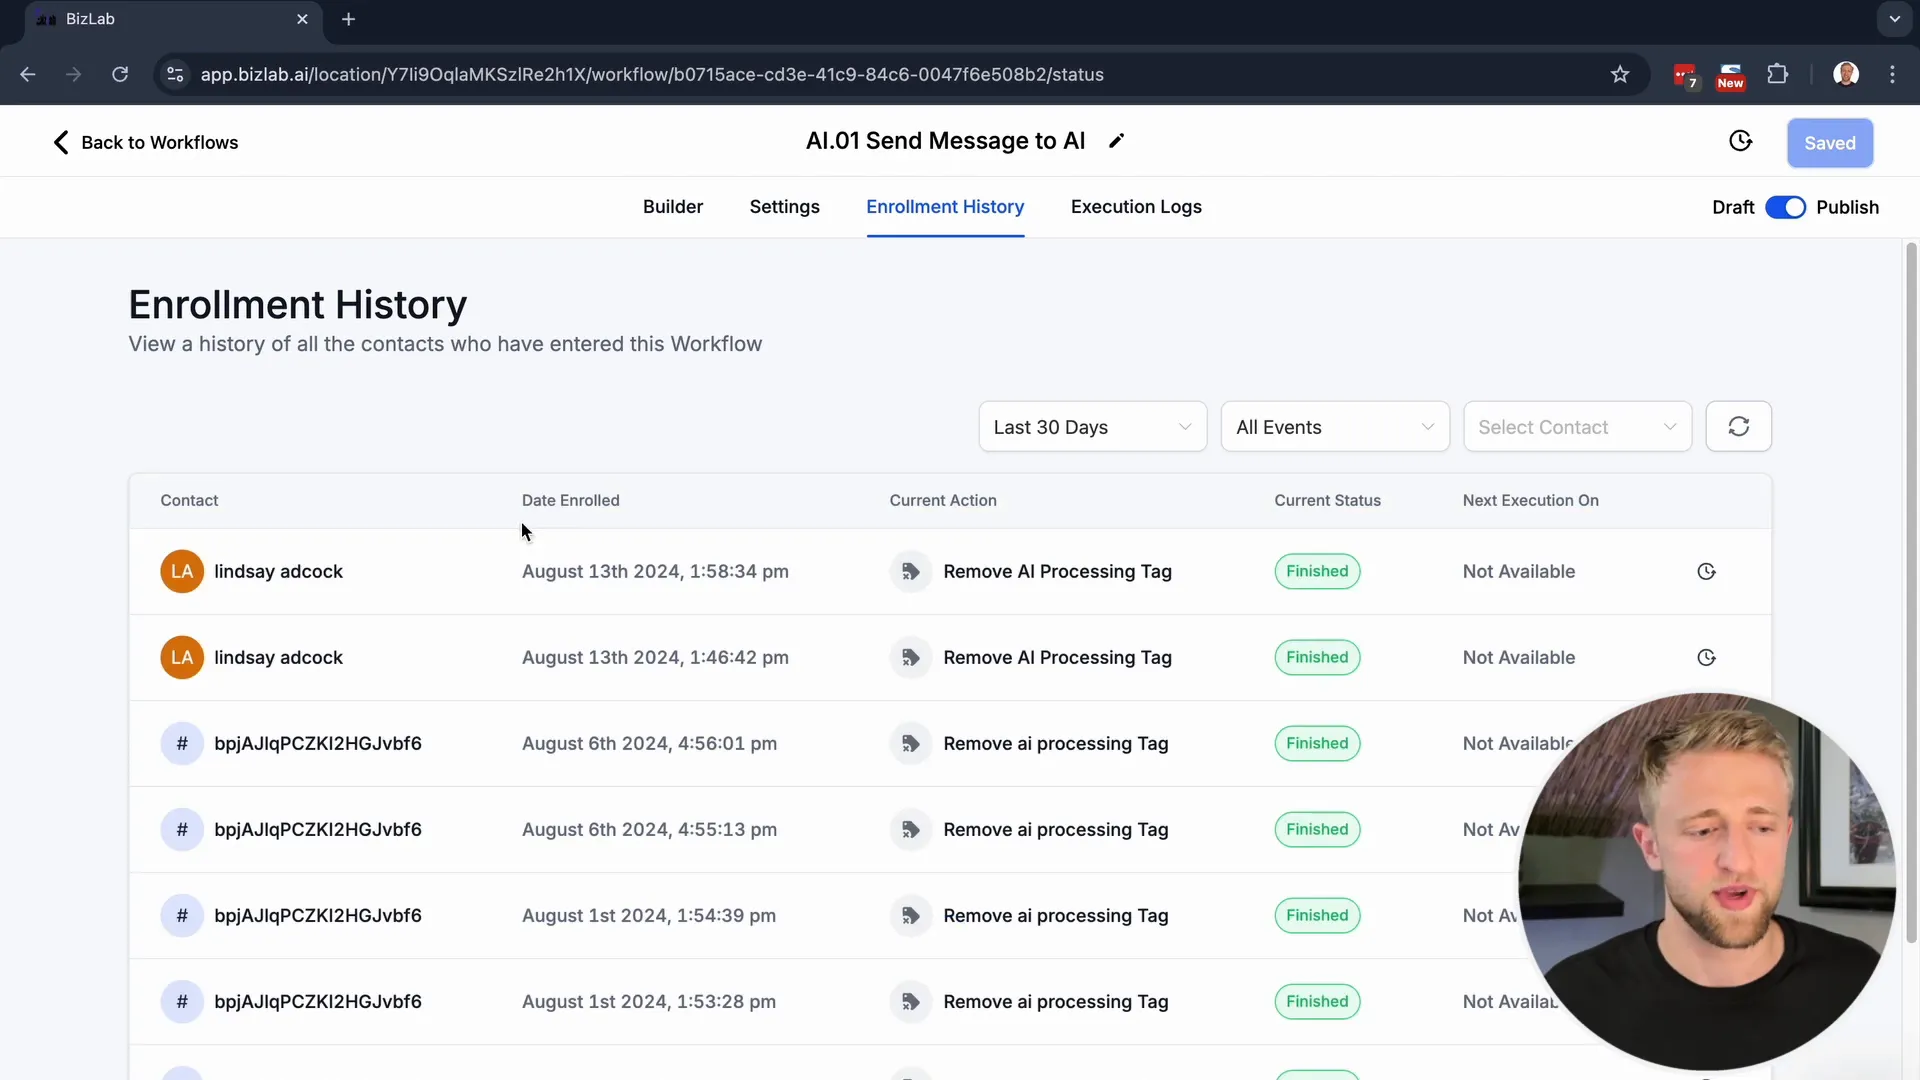
Execution Logs provide a detailed view of each contact's journey through the workflow. If a contact encounters an issue, these logs can help you identify where things went wrong. By analyzing this data, you can make informed adjustments to improve your workflows and enhance overall performance.
Final Thoughts on Mastering Workflows In Lead Connector
Mastering workflows in Lead Connector is a game-changer for any business looking to automate processes and enhance efficiency. By understanding the components of workflows, utilizing recipes, and rigorously testing your automations, you can create a seamless experience for your clients.
Remember that continuous improvement is key. Regularly review your workflows, analyze performance data, and stay updated on new features and recipes to ensure your automations remain effective and relevant.
With the right strategies and tools at your disposal, you can fully leverage the power of Lead Connector to transform your business operations.
FAQs about Workflows In Lead Connector
What are workflows in Lead Connector?
Workflows in Lead Connector are automated sequences of actions triggered by specific events. They help streamline business processes and enhance productivity.
How do I create a workflow in Lead Connector?
To create a workflow, navigate to the Automations tab, select "Create New Workflow," and choose your triggers and actions. You can also use pre-built recipes to simplify the process.
Can I test my workflows before launching them?
Yes, Lead Connector allows you to test your workflows using the "Test Workflow" feature. This enables you to simulate the workflow without affecting live contacts.
What should I do if my workflow isn't working as expected?
If your workflow isn't functioning correctly, check the Execution Logs for detailed insights into what went wrong. You can also review your triggers and actions to ensure they are set up correctly.
How can I improve my workflows over time?
Regularly review performance data, gather feedback from users, and stay updated on new features and recipes in Lead Connector. Continuous learning and adaptation are crucial for maintaining effective workflows.


